How to Pay Invoices from the EU: A Step-by-Step Guide

Paying invoices from the EU can be a complex process, but understanding the steps involved can make it much more manageable. In this guide, we’ll walk you through the key considerations and best practices for settling bills issued by suppliers located within the European Union.

By following these steps, you’ll be better equipped to handle currency conversion, VAT compliance, and choosing the most suitable payment method for your business needs. Let’s dive in and explore how to pay invoices from the EU efficiently and effectively.

Make Global Wire Payments with Float

Canada’s best-in-class EFT, ACH, and Global Wires payments platform — plus average savings of 7%.

What is an Invoice?

An invoice is a document issued by a seller to a buyer that itemizes and records a transaction. Invoices are essential for businesses to request payment for products or services provided.

Why is it Important to Pay Invoices Promptly?

Paying invoices promptly helps maintain good relationships with suppliers, ensuring they continue to provide you with the goods and services your business needs. It also ensures smooth operations and cash flow management, as late payments can disrupt your supply chain and hinder your ability to meet customer demands. Moreover, timely invoice payments help you avoid late fees and penalties, which

How to Pay Invoices from the EU

When paying invoices from the EU, it’s essential to understand the steps involved and the importance of considering currency and VAT implications. By familiarizing yourself with these aspects, you can ensure a smooth and compliant payment process.

Step 1: Verify Invoice Details

Before initiating payment, carefully review the invoice to ensure it includes all necessary details, such as the supplier’s name, address, VAT number, and payment terms. Double-check the accuracy of the information to avoid any discrepancies that could delay the payment process.

Step 2: Understand Payment Methods

Explore the various payment methods available for settling EU invoices, such as SEPA payments, international wire transfers, credit cards, and direct debit in Europe. Consider factors like transaction fees, processing times, and the level of security each method offers to determine which one best suits your business needs.

Step 3: Consider Currency Conversion

If the invoice is denominated in euros and your business operates with a different currency, you’ll need to understand the implications of currency conversion. Research reliable services that offer competitive exchange rates and minimal fees to ensure you get the best value for your money when making the payment.

Step 4: Handle VAT Implications

To maintain VAT compliance, familiarize yourself with EU VAT invoicing rules. If both you and the supplier are VAT-registered, the invoice should include both parties’ VAT numbers. Ensure that the correct VAT treatment is applied to the transaction to avoid any legal or financial complications.

Step 5: Initiate Payment

Once you’ve verified the invoice details, chosen a suitable payment method, and considered currency conversion and VAT implications, it’s time to initiate the payment. Use your accounts payable platform to process the transaction, ensuring that all details match those on the invoice to prevent delays or rejections.

Step 6: Record the Transaction

After successfully completing the payment, record the transaction in your accounting software to maintain accurate financial records. Keep a copy of the paid invoice for your records, as this may be necessary for future reference or auditing purposes.

Make Global Wire Payments with Float

Canada’s best-in-class EFT, ACH, and Global Wires payments platform — plus average savings of 7%.

Final Thoughts

Paying invoices from the EU requires careful attention to detail and a solid understanding of international payment methods and VAT regulations. While there are several options available, using a Global wire is often the safest and most reliable choice for ensuring your payments reach your EU suppliers promptly and securely.

By following the steps outlined in this guide and staying informed about the latest developments in international payments and VAT compliance, you can streamline your EU invoice payment process and maintain strong relationships with your European suppliers.

Streamline Your EU Invoice Payments with Float

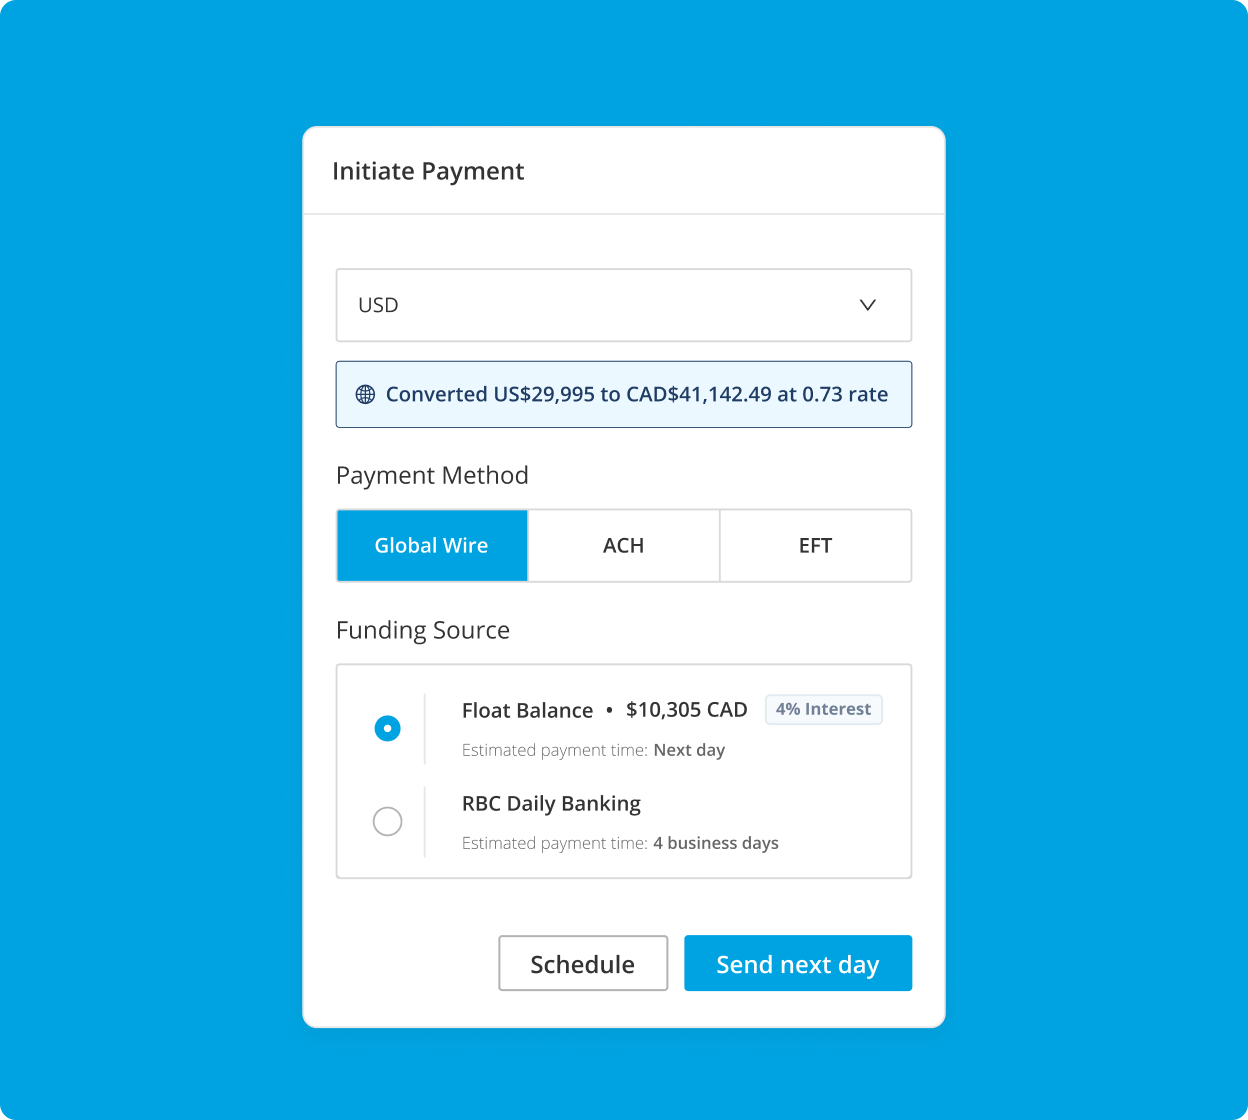
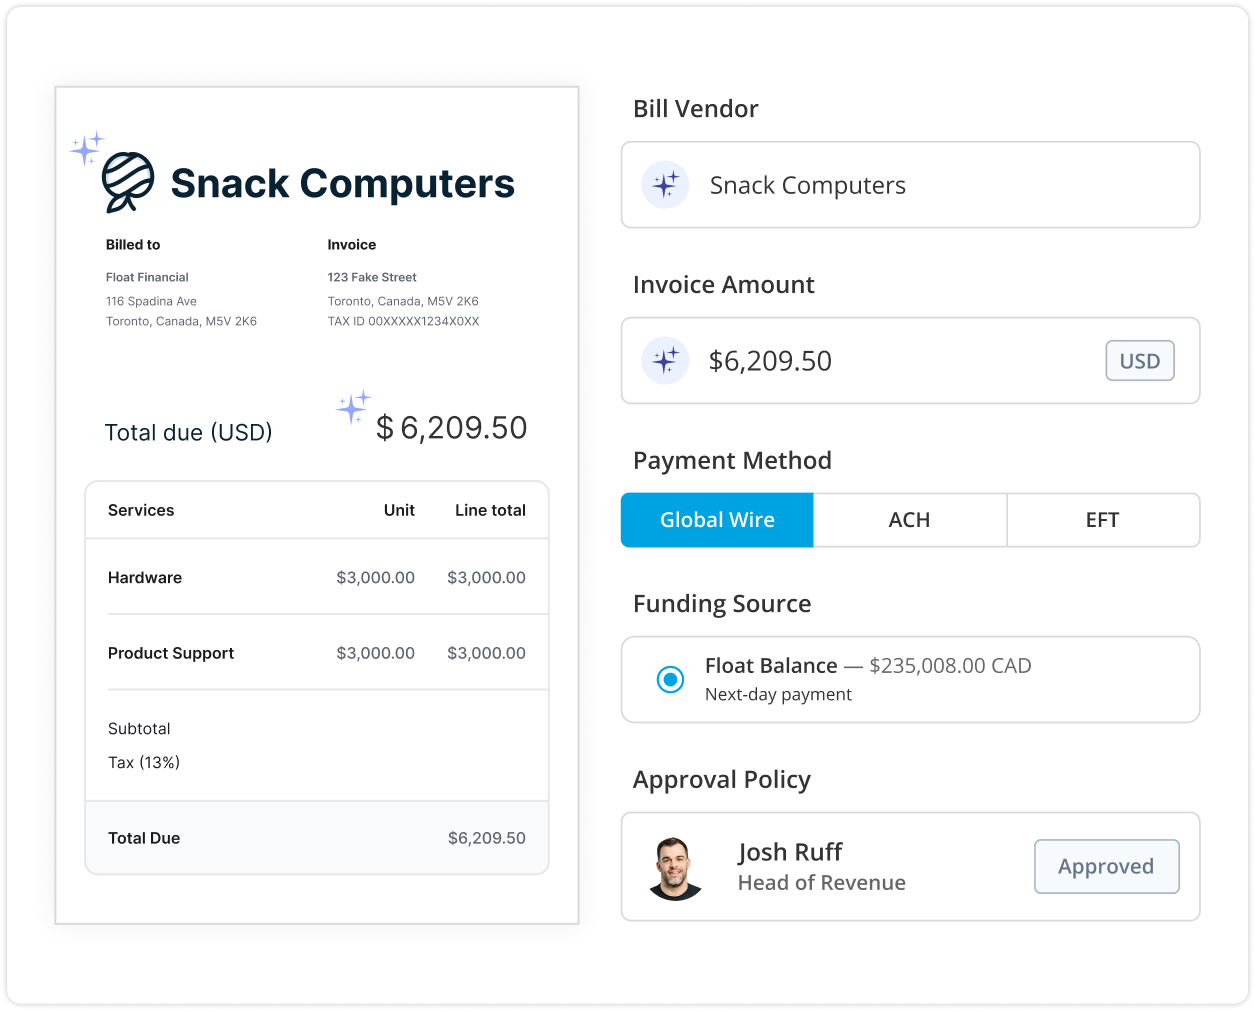
Managing international invoice payments can be a complex and time-consuming process, but with the right tools and solutions, it doesn’t have to be. Float’s Bill Pay platform offers a seamless and efficient way to handle your EU invoice payments, with built-in functionality for Global Wires in USD. With Float’s platform, you can ensure that your EU suppliers are paid promptly and accurately, while minimizing the risk of errors and delays. Say goodbye to the hassle of manual invoice processing and international payment challenges.

We’re here to help you streamline your international payables and take control of your business finances. Get started for free with our Bill Pay solution today and experience the difference for yourself.

Frequently Asked Questions

Global wire transfers: These offer a secure and reliable method for sending payments to EU suppliers, ensuring that funds are transferred directly from your account to theirs.

Global wire transfers: These offer a secure and reliable method for sending payments to EU suppliers, ensuring that funds are transferred directly from your account to theirs.

Understand VAT rules: Familiarize yourself with EU VAT invoicing regulations, ensure both parties’ VAT numbers are included on the invoice, and apply the correct VAT treatment to the transaction.

Contact your bank or payment platform’s customer support to investigate the issue and provide any necessary documentation to resolve the problem promptly.

Record transactions: After completing a payment, record the transaction in your accounting software and keep a copy of the paid invoice for future reference and auditing purposes.

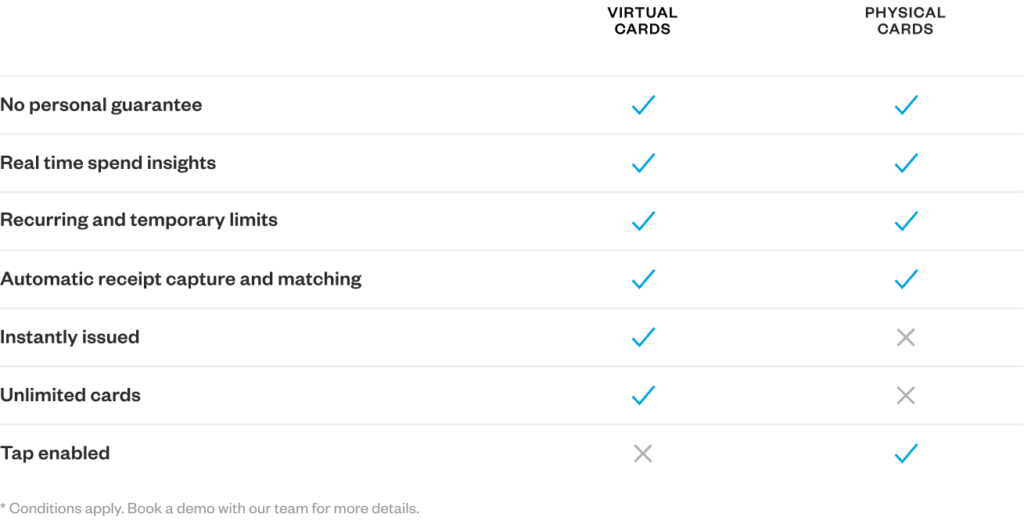
Float is Free to use on our Essentials plan, where you will be able to issue unlimited virtual CAD/USD cards, earn 4% interest on deposits, reimburse employees and pay vendor bills. If you need more sophisticated functionality, like over 20 physical cards, Netsuite integration, or an API solution, you will have to consider our paid Professional and Enterprise plans.

Unlike traditional cards that get you to spend more, Float is the only corporate card in the world that helps businesses spend less. Through a combination of financial rewards like our 1% cashback, 4% interest on deposits, no FX fees with our USD cards and time savings of at least 8 hours per employee Float’s customers on average save 7% on their spend.

How to Pay Invoices from India: A Step-by-Step Guide

As a business owner or financial manager, understanding how to pay invoices from India is crucial for maintaining smooth operations and strong relationships with your suppliers. Whether you’re dealing with domestic or international vendors, timely invoice payments ensure uninterrupted cash flow and help you avoid late fees and penalties.

In this comprehensive guide, we’ll walk you through the step-by-step process of paying invoices from India, covering everything from gathering necessary information to choosing the right payment method and tracking your transactions. By the end of this article, you’ll be equipped with the knowledge and tools to streamline your invoice payment process and keep your business running smoothly.

Make Global Wire Payments with Float

Canada’s best-in-class EFT, ACH, and Global Wires payments platform — plus average savings of 7%.

What is an Invoice?

An invoice is a document issued by a seller to a buyer that itemizes and records a transaction. Invoices are essential for businesses to request payment for products or services provided.

Why is it Important to Pay Invoices Promptly?

Paying invoices promptly helps maintain good relationships with suppliers, ensuring they continue to provide you with the goods and services your business needs. It also ensures smooth operations and cash flow management, as late payments can disrupt your supply chain and hinder your ability to meet customer demands. Moreover, timely invoice payments help you avoid late fees and penalties, which can add up quickly and eat into your profits.

How to Pay Invoices from India: A Step-by-Step Guide

Now that you understand the importance of paying invoices promptly, let’s dive into the steps involved in paying invoices from India. This guide will cover the essential information you need to gather, the various payment methods available, and how to track and record your transactions.

Step 1: Gather Necessary Information

Before you can pay an invoice, you need to ensure you have all the necessary details. This includes the invoice number, amount due, and the due date. You’ll also need to collect the recipient’s bank account information, such as their account number, IFSC code, and SWIFT code, if you plan to make a wire transfer.

Step 2: Choose a Payment Method

There are several payment methods available for paying invoices from India, each with its own advantages and disadvantages. Evaluate the various options, such as wire transfers, credit/debit cards, and online payment platforms, considering factors like transaction fees, exchange rates, and processing times. Choose the method that best suits your business needs and the supplier’s preferences.

Step 3: Using International Payment Methods

  • Wire Transfers: Utilize wire transfer services offered by banks or online platforms to directly transfer funds overseas. This method is secure and reliable but may involve higher fees and longer processing times.
  • Online Payment Gateways: Choose reputable online payment gateways that support international transactions, such as PayPal or Stripe. These platforms offer secure payment processing and often have lower fees than traditional wire transfers.
  • Credit/Debit Cards: If your supplier accepts credit or debit card payments, ensure your card is enabled for foreign transactions. Keep in mind that card payments may incur additional fees and exchange rate charges.

Step 4: Enter Payment Details

Once you’ve chosen your payment method, log in to your selected payment platform and enter the invoice amount and recipient’s bank details or payment gateway information. Double-check all the information to ensure accuracy and avoid delays in processing.

Step 5: Review and Confirm the Payment

Before finalizing the payment, review all the entered information once more to ensure accuracy. Check for any applicable fees and exchange rates, and make sure you understand the total cost of the transaction. Once you’re satisfied, confirm the payment and save the transaction receipt for your records.

Step 6: Track and Record the Payment

After initiating the payment, monitor its status through your bank or payment platform to ensure it reaches the recipient successfully. Record the transaction in your accounting software or ledger, and keep a copy of the payment confirmation for future reference. This will help you maintain accurate financial records and simplify reconciliation processes.

Important Things to Know

What are the steps to pay an invoice from India?

To pay an invoice from India, gather necessary information, choose a payment method, enter payment details, review and confirm the payment, and track and record the transaction.

What payment methods can I use to pay invoices internationally from India?

You can use wire transfers to directly send funds overseas, online payment gateways that support international transactions, or credit/debit cards enabled for foreign transactions to pay invoices from India.

Are there any fees associated with paying invoices from India?

When paying invoices from India, you may encounter transaction fees, currency conversion fees, and other applicable charges depending on the payment method and platform you choose.

What information do I need to provide when paying an invoice from India?

When paying an invoice from India, you’ll need to provide the invoice number, amount due, recipient’s bank details (account number, IFSC code, SWIFT code), and any other relevant information requested.

Make Global Wire Payments with Float

Canada’s best-in-class EFT, ACH, and Global Wires payments platform — plus average savings of 7%.

Best Solution to Send Global Wires in Canada — Float

Float’s Bill Pay solution offers a streamlined and efficient way to manage your invoice payments from India. With features like Global Wires in USD, AI-powered bill processing, and integrated accounting workflows, Float’s Bill Pay simplifies the process of paying invoices internationally. By using Float’s Bill Pay, you can save time, reduce errors, and maintain better control over your business expenses.

At Float, we understand the challenges of paying invoices from India and are committed to simplifying the process for you. Our platform offers a comprehensive solution that streamlines your invoice payments, saving you time and effort while ensuring secure and reliable transactions. Get started for free with Float today and experience the difference in managing your business expenses.

Frequently Asked Questions

Processing times for international invoice payments vary depending on the payment method and the banks involved, but it generally takes 1-5 business days for funds to reach the recipient.

To pay an invoice using a credit card issued in India, ensure your card is enabled for international transactions, enter the required credit card details, and confirm the payment.

Contact your bank or payment platform’s customer support to investigate the issue and provide any necessary documentation to resolve the problem promptly.

Choose reputable payment platforms that use encryption and follow industry-standard security protocols to protect your sensitive information and funds during transactions.

Float is Free to use on our Essentials plan, where you will be able to issue unlimited virtual CAD/USD cards, earn 4% interest on deposits, reimburse employees and pay vendor bills. If you need more sophisticated functionality, like over 20 physical cards, Netsuite integration, or an API solution, you will have to consider our paid Professional and Enterprise plans.

Float offers Charge Card and Prepaid funding models. You can apply (*Conditions apply. Book a demo to learn more) for unsecured, 30-day credit terms with high limits up to $1M, no credit checks and personal guarantees. Prepaid model offers 4% interest on all deposits with no cash lockups with account opening in < 24 hours.

Unlike traditional cards that get you to spend more, Float is the only corporate card in the world that helps businesses spend less. Through a combination of financial rewards like our 1% cashback, 4% interest on deposits, no FX fees with our USD cards and time savings of at least 8 hours per employee Float’s customers on average save 7% on their spend.

How To Choose the Right Expense Reporting Solution in 2024

As a finance professional, you understand the importance of efficiently managing employee expenses. In today’s fast-paced business environment, having a reliable and user-friendly expense report solution is crucial for maintaining financial control and compliance.

When evaluating expense report solutions, it’s essential to consider factors such as ease of use, integration capabilities, and scalability. Choosing the right tool can significantly streamline your expense reporting process, saving valuable time and resources. We’ll also provide guidance on how to select the best solution for your unique business needs and ensure a smooth implementation.

Reimburse Employees with Ease with Float

Canada’s only fully-fledged AI-powered expense reimbursement and mileage tracking platform — plus unlimited Visa Corporate Cards with cashback for high-frequency spenders.

What is an expense report solution?

An expense report solution helps businesses track, manage, and report employee expenses. It automates the expense reporting process, reducing manual effort and errors. Key features include receipt capture, expense categorization, policy enforcement, and analytics.

Benefits of using an expense report solution

  • Streamlined workflow: Automating the expense reporting process saves time and increases efficiency.
  • Real-time visibility: Gain insights into employee spending patterns for better financial control.
  • Compliance assurance: Ensure adherence to company expense policies and tax regulations.

Top features to look for in a free expense report solution

  • Mobile-friendly: A user-friendly mobile app simplifies receipt capture and expense submission on the go.
  • Automatic categorization: Customizable rules automate expense categorization, reducing manual effort.
  • Seamless integration: Look for solutions that integrate with your existing accounting software and corporate cards.
  • Robust reporting: Comprehensive analytics provide valuable insights into spending patterns and trends.
  • Multi-level approvals: Ensure proper review and authorization with customizable approval workflows.

Nice-to-have features

  • Mileage tracking: GPS-based mileage tracking enables accurate reimbursement for business travel.
  • Per diem management: Streamline travel expenses with automated per diem calculations.
  • AI-powered audits: Detect policy violations and potential fraud using advanced machine learning algorithms.

How to choose the right free expense report solution for your business

  • Assess your needs: Identify pain points in your current expense reporting process and prioritize must-have features.
  • Consider user experience: Evaluate ease of use and adoption to ensure employee buy-in.
  • Evaluate integrations: Ensure compatibility with your existing financial tech stack for seamless data flow.
  • Plan for growth: Choose a solution that can scale with your business as it expands.

Key questions to ask

  • Free plan limitations: Determine if the free plan offers sufficient features or if an upgrade will be necessary.
  • Support and training: Inquire about available customer support resources and training materials.
  • Security and compliance: Ensure the solution meets data privacy regulations and security standards.

Implementing and rolling out your free expense report solution

  • Assign a champion: Designate an internal champion to oversee the implementation process and drive adoption.
  • Configure policies: Align the solution’s settings with your company’s expense policy for consistent enforcement.
  • Migrate data: Transfer historic expense data into the new system to maintain continuity.
  • Communicate benefits: Clearly articulate the advantages of the new solution to employees.
  • Provide training: Offer comprehensive training sessions and resources to ensure successful adoption.

Best practices for a smooth rollout

  • Pilot testing: Begin with a pilot group to identify and address any issues before company-wide deployment.
  • Gather feedback: Actively seek employee input and iterate on processes based on their experiences.
  • Celebrate success: Recognize employees who embrace the new tool and share their success stories.

Reimburse Employees with Ease with Float

Canada’s only fully-fledged AI-powered expense reimbursement and mileage tracking platform — plus unlimited Visa Corporate Cards with cashback for high-frequency spenders.

Maximizing ROI from your free expense report solution

  • Leverage integrations: Optimize usage by integrating with your float corporate card for seamless expense tracking.
  • Analyze spend data: Regularly review expense analytics to identify cost-saving opportunities and refine policies.
  • Explore advanced features: Utilize spend controls and automated approvals to further streamline processes.
  • Quantify impact: Calculate time and cost savings to demonstrate the solution’s tangible benefits.

Strategies to increase expense policy compliance

  • Clear guidelines: Establish and frequently communicate explicit expense policies to all employees.
  • Automated enforcement: Leverage the solution’s built-in rules and manager approvals to minimize violations.
  • Real-time visibility: Provide employees with instant access to their expense data for proactive management.

Canada’s Best Expense Reporting Solution — Float

While free expense report solutions can significantly improve your financial processes, they may lack advanced features like AI-powered automation and direct payout capabilities. That’s where we come in. Get started for free with Float’s powerful expense management platform designed specifically for Canadian businesses.

Frequently Asked Questions

Yes, reputable solutions prioritize data security and comply with industry standards like SSL encryption and regular backups.

Most solutions allow you to import historic data via CSV or through direct integrations with accounting software.

Implementation timelines vary, but with proper planning and training, you can be up and running within a few weeks.

Many free solutions offer paid plans with additional features, allowing you to scale as your needs evolve.

Float is Free to use on our Essentials plan, where you will be able to issue unlimited virtual CAD/USD cards, earn 4% interest on deposits, reimburse employees and pay vendor bills. If you need more sophisticated functionality, like over 20 physical cards, Netsuite integration, or an API solution, you will have to consider our paid Professional and Enterprise plans.

Float offers Charge Card and Prepaid funding models. You can apply (*Conditions apply. Book a demo to learn more) for unsecured, 30-day credit terms with high limits up to $1M, no credit checks and personal guarantees. Prepaid model offers 4% interest on all deposits with no cash lockups with account opening in < 24 hours.

Unlike traditional cards that get you to spend more, Float is the only corporate card in the world that helps businesses spend less. Through a combination of financial rewards like our 1% cashback, 4% interest on deposits, no FX fees with our USD cards and time savings of at least 8 hours per employee Float’s customers on average save 7% on their spend.
How to Make an EFT Payment: A Step-by-Step Guide

As a business owner, you’re always looking for ways to streamline your financial operations and make payments more efficient. Electronic Funds Transfers (EFTs) have become an increasingly popular method for sending and receiving payments, thanks to their speed, security, and convenience.

In this guide, we’ll walk you through the process of making an EFT payment, step by step. By the end, you’ll have a clear understanding of how to initiate and track EFT transactions, ensuring smooth and accurate payments every time.

Make EFT Payments with Float

Canada’s best-in-class EFT, ACH, and Global Wires payments platform — plus average savings of 7%.

What is an Electronic Funds Transfer (EFT)?

An Electronic Funds Transfer (EFT) is a digital transaction that moves money from one bank account to another without the need for physical paperwork. EFTs are commonly used for a variety of payments, including payroll, vendor payments, and personal transactions.

Why use EFT payments?

EFT payments offer significant benefits over traditional payment methods. They’re faster, more convenient, and more cost-effective than checks or cash. By eliminating the need for physical paperwork, EFTs reduce administrative work and enhance financial control.

How to Make an EFT Payment: A Step-by-Step Guide

Initiating an EFT payment is a straightforward process that requires the correct information and authorization. By following these steps, you can ensure a smooth and secure transaction every time.

1. Gather necessary information

Before you can initiate an EFT payment, you’ll need to obtain the recipient’s bank account number and routing number. It’s crucial to verify that the recipient’s name matches the bank account details to avoid any errors or delays.

2. Choose your payment method

There are several ways to initiate an EFT payment, including online banking, mobile banking, or an accounts payable platform. Each method may have slightly different steps, but they all generally require the same information.

3. Log in to your banking platform

To get started, access your online or mobile banking platform using your login credentials. Once you’re in, navigate to the section for payments or transfers.

4. Enter payment details

Input the recipient’s bank account number and routing number, along with the payment amount and any relevant payment notes or references. Double-check all information for accuracy before proceeding.

5. Review and confirm the payment

Before finalizing the transaction, take a moment to review all entered information one last time. Once you’re confident everything is correct, confirm the payment and authorize the transaction. Some platforms may require two-factor authentication for added security.

6. Track the payment

After initiating the EFT payment, you can monitor its status through your banking platform. Most platforms provide real-time updates and notifications upon successful completion, giving you peace of mind that your payment has been processed.

Tips on Making EFT Payments

1. Ensure accurate information

To avoid errors and delays, always double-check the recipient’s bank details before initiating a transfer. Even a small mistake can cause significant headaches down the line.

2. Use secure networks

When conducting EFT transactions, it’s essential to use secure internet connections to protect your financial information. Avoid using public Wi-Fi for financial transactions, as these networks are more vulnerable to security breaches.

3. Monitor your transactions

Regularly check your bank statements and transaction history to ensure all EFT payments are accurate and authorized. If you notice any discrepancies, report them immediately to your financial institution to resolve the issue promptly.

Make EFT Payments with Float

Canada’s best-in-class EFT, ACH, and Global Wires payments platform — plus average savings of 7%.

Streamline Your EFT Payments with Cutting-Edge Solutions

When it comes to making EFT payments, using a dedicated bill pay service can greatly simplify the process and provide additional benefits. A reliable bill pay solution should offer features like embedded EFT Payments, Automatically Generated Payment Confirmation Letter, ability to pay in USD and CAD, and earn interest from funds in transit.

By using a comprehensive bill pay service, you can enjoy a centralized platform for managing all your invoice payments, regardless of the payment method or currency. This streamlined approach saves you time, reduces the risk of errors, and provides greater visibility into your financial transactions.

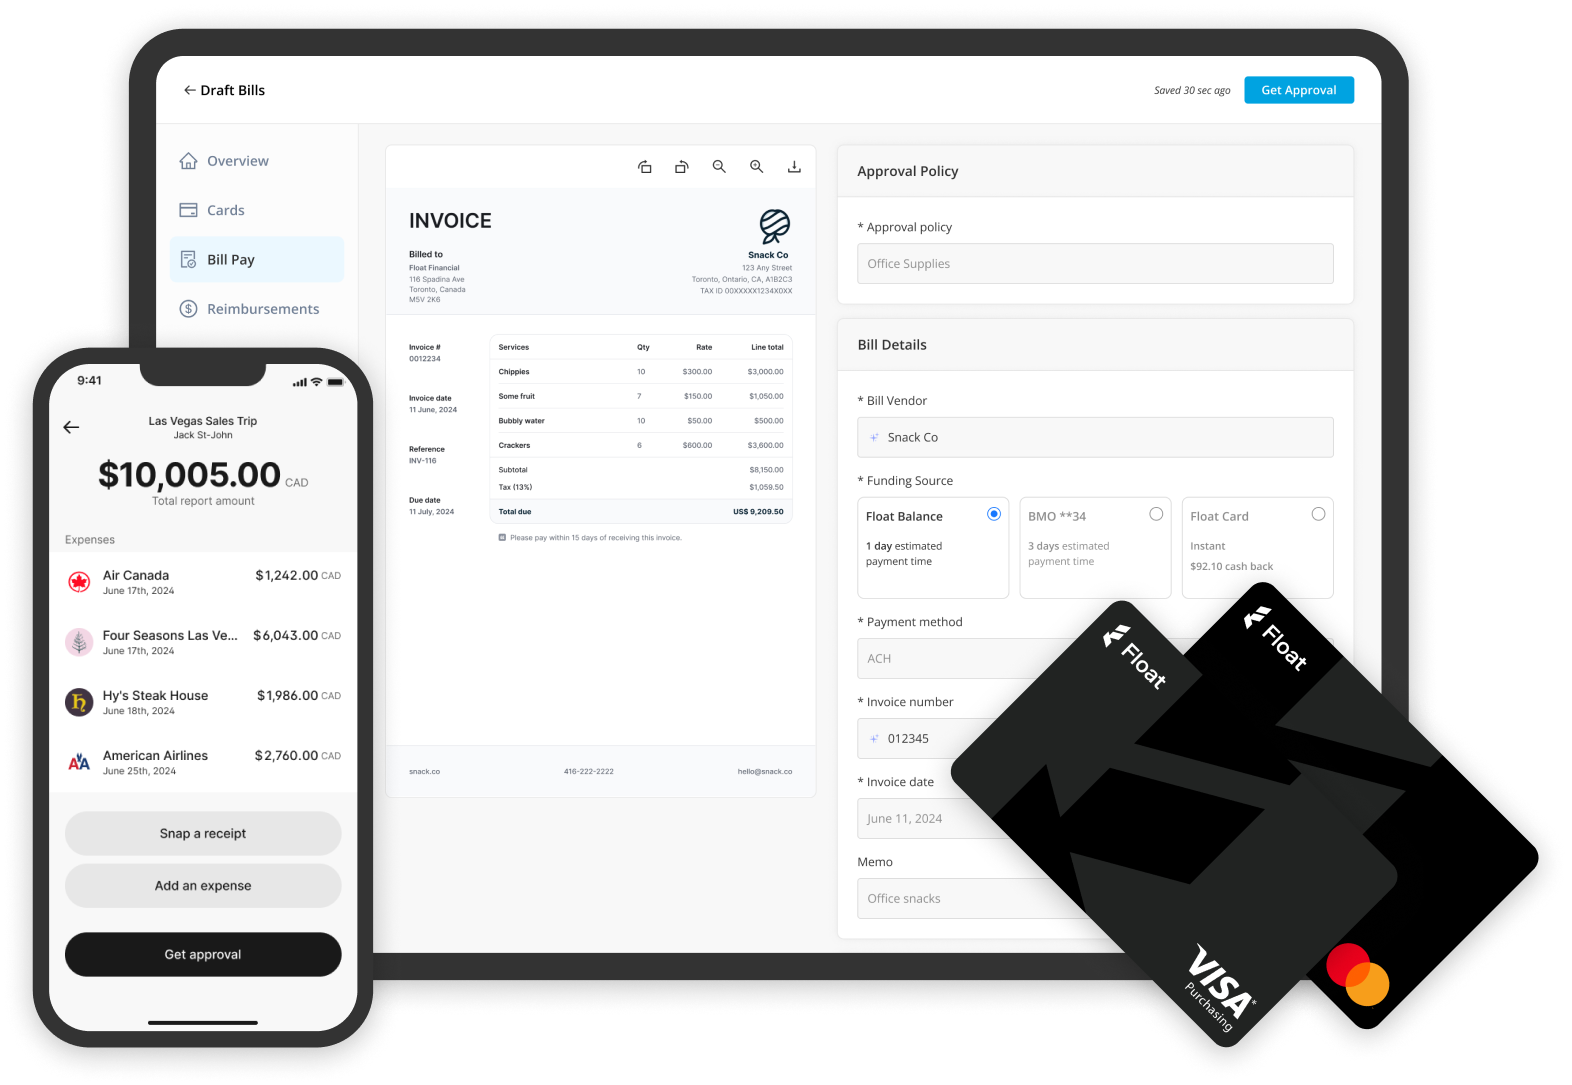
If you’re looking for a comprehensive solution to streamline your EFT payment process, we invite you to explore Float’s Bill Pay service. With features like AI-powered Bill Intake, embedded EFT/ACH and Global Wires, and 4% interest on funds, Float’s platform is designed to simplify the way you manage and make EFT payments in Canada. Get started for free today and experience the benefits of a powerful, user-friendly bill pay solution that can help you save time, reduce errors, and maintain better control over your financial transactions.

Frequently Asked Questions

EFT payments typically take 1-4 business days to process, depending on the receiving bank and the time of day the transaction is initiated. With Float’s Bill Pay solution, you can pay out directly from your Float Balance making your maybe arrive within the next business day.

In most cases, EFT payments do not incur any fees from the sending or receiving bank. However, some banks may charge a small fee for outgoing transfers, so it’s best to check with your financial institution. When you process an EFT payment on Float, there is a small, fixed feel os $1 CAD per transaction.

Canceling an EFT payment after it has been initiated is not always possible. If the funds have already been released, you’ll need to contact the recipient directly to request a refund.

Most banks do not impose limits on the amount of money you can send via EFT. However, some banks may have daily or monthly transfer limits for security reasons. Check with your bank for specific limits.

Float is Free to use on our Essentials plan, where you will be able to issue unlimited virtual CAD/USD cards, earn 4% interest on deposits, reimburse employees and pay vendor bills. If you need more sophisticated functionality, like over 20 physical cards, Netsuite integration, or an API solution, you will have to consider our paid Professional and Enterprise plans.

Float offers Charge Card and Prepaid funding models. You can apply (*Conditions apply. Book a demo to learn more) for unsecured, 30-day credit terms with high limits up to $1M, no credit checks and personal guarantees. Prepaid model offers 4% interest on all deposits with no cash lockups with account opening in < 24 hours.

Unlike traditional cards that get you to spend more, Float is the only corporate card in the world that helps businesses spend less. Through a combination of financial rewards like our 1% cashback, 4% interest on deposits, no FX fees with our USD cards and time savings of at least 8 hours per employee Float’s customers on average save 7% on their spend.

How to Pay an Invoice from Mexico: A Step-by-Step Guide

Paying invoices from Mexico can be a complex process, but understanding the steps involved is essential for businesses to maintain smooth operations and good relationships with Mexican vendors. By familiarizing yourself with the invoice payment process in Mexico, you can ensure timely and accurate payments while avoiding potential delays and extra fees.

In this guide, we’ll walk you through the steps involved in paying an invoice from Mexico, including choosing the right payment method, gathering necessary information, and handling any issues that may arise. By following these guidelines, you can streamline your international financial transactions and maintain compliance with local regulations.

Pay Mexico Bills with Float

Canada’s best-in-class Payments platform for Global Wires, EFT, and ACH payments — plus average savings of 7%.

What is the invoice payment process in Mexico?

The invoice payment process in Mexico involves specific steps to ensure timely and accurate payments. It includes understanding payment methods, gathering necessary information, and following correct procedures to avoid delays and extra fees.

Why is understanding how to pay an invoice from Mexico important?

Understanding how to pay an invoice from Mexico is crucial for businesses to maintain good relationships with Mexican vendors, avoid payment delays, and ensure compliance with local regulations. It also helps in managing international financial transactions efficiently.

How to pay an invoice from Mexico

Paying an invoice from Mexico involves several steps, each of which is important to ensure a smooth and successful transaction. Choosing a reliable payment method and understanding the process is crucial to avoid delays and extra fees.

Step 1: Choose the right payment method

When paying an invoice from Mexico, you have several options, including bank transfers, online payment platforms, and payment services. Consider factors like fees, processing times, and convenience when selecting the best international payment methods for your needs.

Step 2: Gather necessary information

Before initiating the payment, ensure you have all the necessary information, such as the recipient’s bank details, invoice number, and payment amount. Verifying the accuracy of this information is crucial to avoid payment failures. Using the best accounts payable platform can help streamline this process.

Step 3: Initiate the payment

Once you have chosen your payment method and gathered the necessary information, you can initiate the payment. The specific steps will vary depending on whether you’re using an online platform, bank transfer, or payment service. Be sure to follow the instructions carefully and double-check all details before submitting the payment. When paying from the US, consider using services that specialize in paying bills from US to Mexico to ensure a smooth transaction.

Step 4: Confirm the payment

After initiating the payment, it’s important to check the payment status and confirm receipt with the vendor. This helps ensure that the transaction was successful and allows you to address any issues promptly. Keeping records of the confirmation for future reference is also a good practice.

Step 5: Handle any issues

In some cases, you may encounter issues such as failed transactions or incorrect details. If this happens, it’s important to take steps to resolve the issue quickly and efficiently.

Pay Mexico Bills with Float

Canada’s best-in-class Payments platform for Global Wires, EFT, and ACH payments — plus average savings of 7%.

Tips on avoiding payment delays

To minimize the risk of payment delays when paying invoices from Mexico, consider the following tips:

  • Verify all details before initiating payment: Double-check recipient information and payment amounts to ensure accuracy.
  • Choose the right payment method based on your needs: Consider factors like fees, processing times, and reliability when selecting a payment method.
  • Keep records of all transactions: Maintain documentation for future reference and tax purposes.
  • Communicate regularly with vendors: Ensure clear communication to address any issues promptly and maintain good relationships.

The Best Solution for Paying Invoices from the UK

When it comes to paying invoices from Mexico, using a dedicated bill pay service can greatly simplify the process and provide additional benefits. A reliable bill pay solution should offer features like Global Wires for international payments. By using a comprehensive bill pay service, you can enjoy a centralized platform for managing all your invoice payments, regardless of the payment method or currency. This streamlined approach saves you time, reduces the risk of errors, and provides greater visibility into your financial transactions.

At Float, we understand the importance of streamlining your invoice payment process and ensuring smooth transactions with your Mexican vendors. Float’s user-friendly platform and expert support team are here to help you navigate the complexities of international payments.

Frequently Asked Questions

The best methods to pay invoices in Mexico include bank transfers, online payment platforms, and payment services. Choose the method that best suits your needs based on fees, processing times, and convenience.

Yes, you can pay invoices online from the US to Mexico using various payment services and platforms. Look for providers that specialize in international payments to ensure a smooth transaction.

To pay an invoice in Mexico, you’ll need the recipient’s bank details, invoice number, and payment amount. Double-check all information for accuracy before initiating the payment.

Payment processing times in Mexico can vary depending on the payment method used. Bank transfers may take several business days, while online payment platforms often offer faster processing times.

Float is Free to use on our Essentials plan, where you will be able to issue unlimited virtual CAD/USD cards, earn 4% interest on deposits, reimburse employees and pay vendor bills. If you need more sophisticated functionality, like over 20 physical cards, Netsuite integration, or an API solution, you will have to consider our paid Professional and Enterprise plans.

Float offers Charge Card and Prepaid funding models. You can apply (*Conditions apply. Book a demo to learn more) for unsecured, 30-day credit terms with high limits up to $1M, no credit checks and personal guarantees. Prepaid model offers 4% interest on all deposits with no cash lockups with account opening in < 24 hours.

Unlike traditional cards that get you to spend more, Float is the only corporate card in the world that helps businesses spend less. Through a combination of financial rewards like our 1% cashback, 4% interest on deposits, no FX fees with our USD cards and time savings of at least 8 hours per employee Float’s customers on average save 7% on their spend.
How to Pay an Invoice from the UK: A Step-by-Step Guide

Paying invoices from the UK can be a straightforward process, but it’s essential to understand the steps involved to ensure timely and accurate payments. Whether you’re settling domestic or international bills, having a clear guide can help you navigate the process efficiently.

In this article, we’ll walk you through the steps required to pay an invoice from the UK, including gathering necessary information, choosing the right payment method, and complying with HMRC requirements. By following these guidelines, you can streamline your invoice payment process and maintain strong relationships with your suppliers and vendors.

Pay UK Bills with Float

Canada’s best-in-class Payments platform for Global Wires, EFT, and ACH payments — plus average savings of 7%.

What is an Invoice Payment?

An invoice payment is a remittance made by a company or individual to settle a bill for goods or services rendered. This process involves transferring funds from the payer’s bank account to the payee’s account, often requiring specific details like IBAN and SWIFT/BIC codes for international transactions.

How to Pay an Invoice from the UK

Paying an invoice from the UK involves several steps to ensure the transaction is completed accurately and efficiently. This guide will walk you through the process, whether you are making a domestic or international payment.

Step 1: Gather Required Information

  • Invoice Details: Ensure you have the correct invoice details, including the invoice number, payment amount, and due date.
  • International Payments: For international payments, gather the payee’s IBAN, SWIFT/BIC code, and full account holder name.
  • HMRC Compliance: Verify any additional details required by the HMRC for compliance with invoicing guidelines.

Step 2: Choose a Payment Method

  • Options: Decide whether to use a bank transfer, bill pay platform, or wire transfer.
  • International Transactions: For international transactions, consider using a service that offers competitive exchange rates and low fees.
  • Currency Support: Check if the payment method supports the currency you need to pay in.

Step 3: Initiate the Payment

  • Online Banking or Bill Pay: Log into your online banking or float bill pay account.
  • Payee Information: Enter the payee’s information, including the IBAN and SWIFT/BIC codes for international payments.
  • Double-Check Details: Double-check the payment amount and currency to avoid errors.

Step 4: Review and Confirm the Payment

  • Careful Review: Before confirming, review all the entered details carefully.
  • Currency Settings: Ensure that the payment method is set to the correct currency.
  • Record Keeping: Confirm the payment and keep a record of the transaction for your records.

Step 5: Handle Fees and Exchange Rates

  • Be Aware of Fees: Be aware of any fees associated with the payment method you choose.
  • Monitor Exchange Rates: For cross-border payments, monitor the exchange rate to ensure you get the best deal.
  • Currency Specialists: Consider using a currency specialist if you make frequent international payments.

Step 6: Comply with HMRC Requirements

  • Adhere to Guidelines: Ensure that you are adhering to HMRC guidelines for invoicing and VAT.
  • Record Transactions: Record the transaction in your accounting software and keep all relevant documentation.
  • Reference Guide: For more information, refer to the invoice payment guide.

Tips for Efficient Invoice Payments

1. Keep Records Organized

  • Detailed Records: Maintain a detailed record of all invoice payments and relevant documentation.
  • Accounting Software: Use accounting software to track payments and manage invoices.

2. Monitor Exchange Rates

  • Regular Checks: Regularly check exchange rates when making international payments.
  • Real-Time Tracking: Use tools or services that offer real-time rate tracking to optimize your payments.

3. Choose the Right Payment Platform

  • Business Needs: Select a bill pay platform that suits your business needs.
  • Transparency: Ensure the platform supports the required currencies and provides transparent fee structures.

Pay UK Bills with Float

Canada’s best-in-class Payments platform for Global Wires, EFT, and ACH payments — plus average savings of 7%.

The Best Solution for Paying Invoices from the UK

When it comes to paying invoices from the UK, using a dedicated bill pay service can greatly simplify the process and provide additional benefits. A reliable bill pay solution should offer features like Global Wires for international payments.

By using a comprehensive bill pay service, you can enjoy a centralized platform for managing all your invoice payments, regardless of the payment method or currency. This streamlined approach saves you time, reduces the risk of errors, and provides greater visibility into your financial transactions.

If you’re looking for a comprehensive solution to streamline your invoice payment process, we invite you to explore Float’s Bill Pay service. With features like Global Wires functionality, Float’s platform is designed to simplify the way you manage and pay your invoices from the UK. Get started for free today and experience the benefits of a powerful, user-friendly bill pay solution that can help you save time, reduce errors, and maintain better control over your financial transactions.

Frequently Asked Questions

A: To pay an international invoice, you’ll need the payee’s IBAN, SWIFT/BIC code, and full account holder name, along with the invoice details like number, amount, and due date.

Adhere to HMRC guidelines for invoicing and VAT, record transactions in your accounting software, and keep all relevant documentation. Refer to the invoice payment guide for more information.

When selecting a payment method for international invoices, consider factors like exchange rates, fees, currency support, and the platform’s suitability for your business needs. Opt for services with competitive rates and transparent fee structures.

To efficiently track invoice payments, maintain detailed records of all transactions and relevant documentation. Utilize accounting software to manage invoices and monitor payments. Regularly review your records to ensure accuracy and compliance.

Float is Free to use on our Essentials plan, where you will be able to issue unlimited virtual CAD/USD cards, earn 4% interest on deposits, reimburse employees and pay vendor bills. If you need more sophisticated functionality, like over 20 physical cards, Netsuite integration, or an API solution, you will have to consider our paid Professional and Enterprise plans.

Float offers Charge Card and Prepaid funding models. You can apply (*Conditions apply. Book a demo to learn more) for unsecured, 30-day credit terms with high limits up to $1M, no credit checks and personal guarantees. Prepaid model offers 4% interest on all deposits with no cash lockups with account opening in < 24 hours.

Unlike traditional cards that get you to spend more, Float is the only corporate card in the world that helps businesses spend less. Through a combination of financial rewards like our 1% cashback, 4% interest on deposits, no FX fees with our USD cards and time savings of at least 8 hours per employee Float’s customers on average save 7% on their spend.
How Expense Management Can Transform Canadian Enterprises

As a finance leader in a Canadian enterprise, you understand the critical role that effective expense management plays in driving business success. By streamlining processes, enhancing visibility, and enabling data-driven decision making, a robust expense management system can transform the way your organization operates.

In this article, we’ll explore the challenges of traditional expense management approaches and highlight how modern solutions are empowering Canadian businesses to optimize their financial operations. You’ll discover the key features to look for in an expense management platform and learn how these tools can help your enterprise achieve its goals.

Manage Spend with Float

Canada’s only finance & corporate cards Spend Management platform that helps businesses save 7% on their spend.

What is Expense Management?

Expense management is the process of tracking, controlling, and optimizing business spending. It involves recording expenses, enforcing spending policies, and analyzing financial data to identify opportunities for cost savings and process improvements. Modern expense management solutions streamline this process through automation and real-time visibility, enabling finance teams to focus on strategic initiatives rather than manual tasks.

The Challenges of Traditional Expense Management for Canadian Businesses

  • Time-consuming manual processes: Manual expense tracking is error-prone and diverts valuable resources from more strategic activities.
  • Lack of real-time visibility: Without instant access to spending data, finance teams struggle to make informed decisions and identify potential issues.
  • Difficulty enforcing policies: Ensuring compliance with company spending policies is challenging when relying on manual processes and post-transaction audits.
  • Tedious reconciliation: Reconciling expenses with accounting systems is a time-consuming month-end task that can delay financial reporting.
  • Administrative burden: Managing paper receipts and expense reports creates unnecessary administrative work for employees and finance teams.

How Modern Expense Management Solutions Benefit Canadian Enterprises

  • Automated expense tracking: Eliminate manual data entry and reduce errors by automatically capturing transaction data from corporate cards and receipts.
  • Real-time visibility: Gain instant insights into company-wide spending patterns, enabling proactive decision making and budget management.
  • Simplified policy enforcement: Customize spending controls and approval workflows to ensure compliance with company policies.
  • Seamless accounting integration: Integrate directly with accounting software like QuickBooks and Xero for faster, more accurate reconciliation.
  • Streamlined expense reporting: Digitize receipt capture and simplify expense report submission via web and mobile apps, reducing administrative burden.
  • Data-driven insights: Leverage robust reporting and analytics to identify cost-saving opportunities and optimize spending.

Key Features to Look for in an Expense Management Platform

  • Powerful corporate cards: Look for corporate card benefits like built-in spend controls, instant transaction data, and seamless integration with your expense management system.
  • Mobile receipt capture: Enable employees to easily capture and submit receipts on-the-go using a mobile app.
  • Customizable workflows: Ensure the platform allows you to tailor approval processes and spending policies to your organization’s unique needs.
  • Accounting software integration: Prioritize solutions that offer direct integration with your existing accounting software to streamline reconciliation.
  • Comprehensive reporting: Choose a platform with robust reporting and analytics capabilities to gain valuable insights into spending patterns and identify areas for optimization.

Choosing the Right Expense Management Solution for Your Canadian Business

When selecting an expense management platform, it’s essential to evaluate your organization’s specific needs and pain points. Consider the inefficiencies in your current processes and identify areas where automation and streamlining can have the greatest impact.

Look for a solution that is tailored to the unique requirements of Canadian businesses, such as multi-currency support and compliance with Canadian tax regulations. Ease of use should also be a top priority, as a user-friendly interface will encourage employee adoption and minimize training requirements.

Assess the platform’s integration capabilities with your existing accounting and finance tech stack. Seamless integration with tools like QuickBooks and Xero will ensure a smooth transition and minimize disruption to your workflows. Finally, prioritize data security and privacy, especially when dealing with sensitive financial information, to protect your business and maintain client trust.

Implementing an Expense Management System: Best Practices

  • Define clear policies: Clearly communicate expense policies to all employees to ensure compliance and minimize confusion.
  • Provide comprehensive training: Offer training and support during the rollout phase to help employees adapt to the new system.
  • Start with a pilot group: Begin with a small pilot group before deploying company-wide to identify and address any issues early on.
  • Encourage adoption: Use incentives and gamification techniques to encourage employee adoption and maintain engagement.
  • Continuously improve: Gather feedback from users and iterate on processes as needed to optimize performance and user satisfaction.

The Future of Expense Management for Canadian Enterprises

As technology continues to advance, expense management solutions will become even more sophisticated and powerful. AI-powered expense auditing and fraud detection will help businesses identify and prevent unauthorized spending, while predictive analytics will enable proactive budget management and forecasting.

Blockchain technology may also play a role in secure and transparent expense tracking, providing an immutable record of transactions and reducing the risk of fraud. Greater integration with corporate travel management systems will streamline the end-to-end travel and expense process, from booking to reimbursement.

Personalized spend insights and recommendations for employees will help them make more informed decisions about their business spending, while also identifying opportunities for cost savings at the individual level.

Manage Spend with Float

Canada’s only finance & corporate cards Spend Management platform that helps businesses save 7% on their spend.

How Float’s Spend Management is Transforming Canadian Businesses

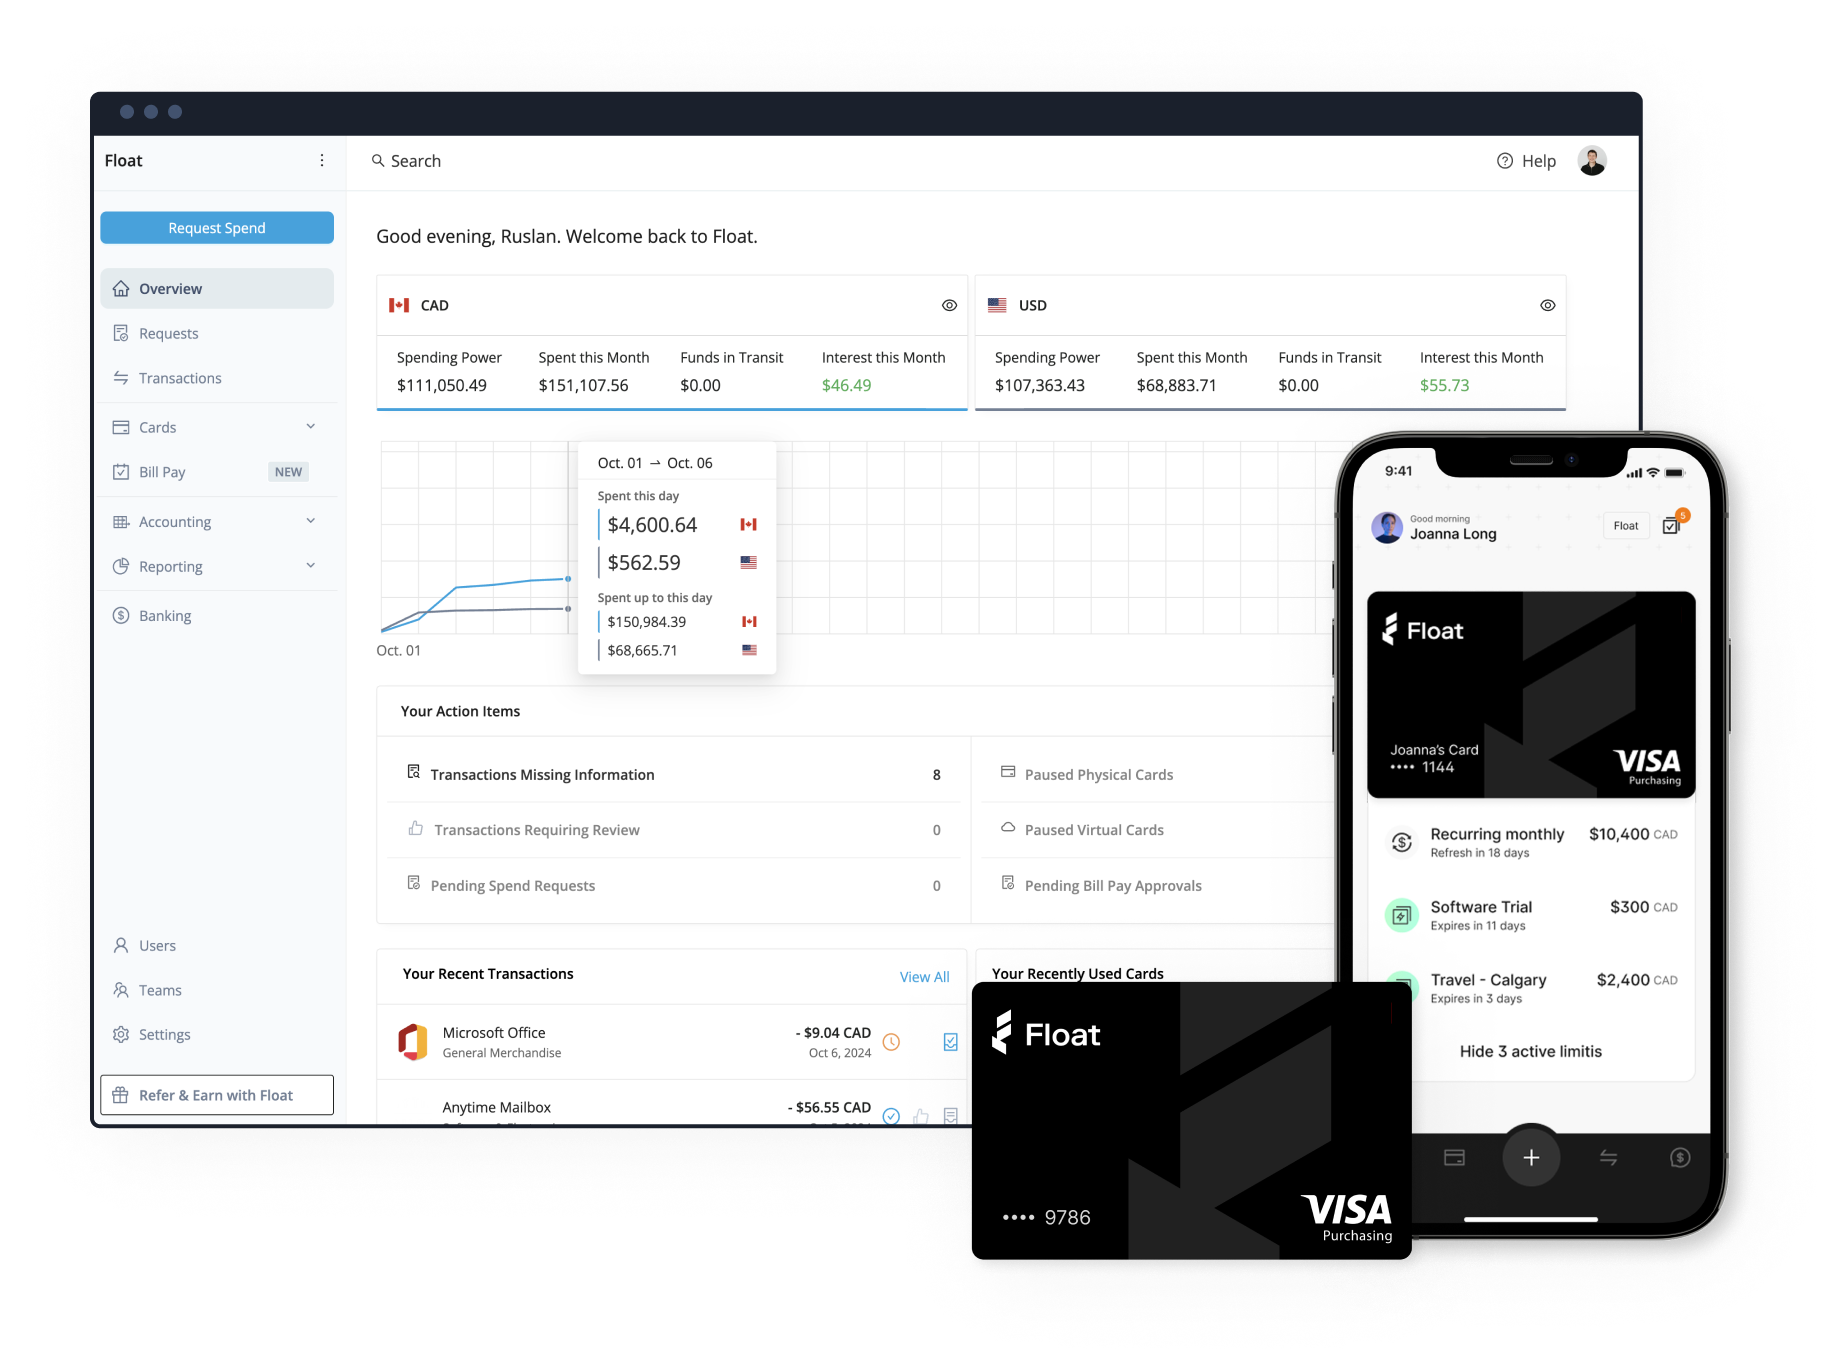
An all-in-one platform that combines corporate cards, expense management, and bill pay can revolutionize the way Canadian enterprises manage their finances. By offering 1% cashback on all spend and 4% interest on deposits, businesses can maximize their savings and improve their bottom line.

Automated receipt capture and one-click expense report submission streamline the expense reporting process, while seamless integration with popular accounting software ensures accurate and up-to-date financial data. Advanced spend controls and real-time transaction monitoring provide unparalleled visibility into company-wide spending, enabling finance teams to make informed decisions and identify potential issues before they escalate.

Float is the only Canadian Spend Management platform that helps businesses save on average 7% of their spend. Float offers powerful accounting automations, 4% interest on all funds held in Float and a Charge Card option. Float also features multitude of payment options with Corporate Cards, Bill Pay, and Reimbursements (including EFT payouts). Float is completely free to use on the Essentials plan, so why not just give it a try?

How to Pay Invoices from the US: A Step-by-Step Guide

Paying invoices from the US can be a straightforward process, but it’s essential to understand the various methods available and choose the one that best suits your needs. By selecting the right payment method, you can ensure that your invoices are paid efficiently and cost-effectively, helping you maintain strong relationships with your vendors and service providers.

In this comprehensive guide, we’ll walk you through the steps involved in paying invoices from the US, including gathering the necessary information, choosing a payment method, and verifying the transaction. Whether you prefer online payments, credit cards, or bank transfers, we’ve got you covered with practical tips and insights to streamline your invoice payment process.

Pay US Bills with Float

Canada’s best-in-class Payments platform for USD and CAD ACH, Global Wires, and EFT payments — plus average savings of 7%.

What is Invoice Payment?

Invoice payment is the process of transferring funds to a vendor or service provider for goods or services received. Ensuring timely and accurate payment is crucial for maintaining good business relationships and avoiding late fees.

How to Pay Invoices from the US

Paying invoices from the US involves several methods, each with its own advantages and considerations. Choosing the right payment method is essential for efficiency and cost-effectiveness.

Step 1: Gather the Necessary Information

Before making a payment, ensure you have the invoice number, amount due, due date, and payment instructions. Verify the payment details to avoid errors and delays.

Step 2: Choose a Payment Method

There are several options for paying invoices from the US, including bank transfers, credit cards, online payment gateways, and checks. Consider factors like fees, speed, and convenience when selecting the best method for your needs.

Step 3: Pay Invoice Online

Paying invoices online is often the quickest and most convenient option. Log into your bank or payment provider’s portal, enter the required details, and authenticate the payment. Online payments offer the benefits of speed and ease of use.

Step 4: Pay Invoice with Credit Card

If the vendor accepts credit card payments, you can easily pay your invoice by entering the card details and confirming the transaction. Be aware of any potential fees associated with credit card payments, but also consider the benefits, such as rewards or cashback.

Step 5: Pay Invoice with PayPal

PayPal is another popular option for paying invoices. Log into your PayPal account, select ‘Send Money,’ and enter the vendor’s details. Confirm the payment and save the transaction receipt for your records.

Step 6: Bank Transfer Invoice Payment

Bank transfers are a reliable method for paying invoices. Log into your online banking portal, set up a new payee with the vendor’s bank details, enter the amount and payment reference, then confirm the transfer.

Step 7: Pay International Invoices

When paying international invoices, ensure you understand the currency and conversion rates. Using a reliable international payment provider can help simplify the process and provide benefits like competitive exchange rates and faster processing times.

Step 8: Verify and Record the Payment

After making a payment, check that the transaction has been processed and received by the vendor. Record the payment in your accounting system to maintain accurate financial records and facilitate future reconciliation.

Pay US Bills with Float

Canada’s best-in-class Payments platform for USD and CAD ACH, Global Wires, and EFT payments — plus average savings of 7%.

Tips for Efficient Invoice Payment

1. Schedule payments in advance

To ensure you never miss a due date, consider setting up reminders or automatic payments for your invoices. This proactive approach helps you stay on top of your financial obligations and maintain a positive relationship with your vendors.

2. Consolidate payments

If you have multiple invoices to pay, consider using batch payments to streamline the process. By handling several invoices at once, you can save time and reduce the risk of errors.

3. Monitor payment statuses

Regularly checking the status of your pending and completed payments is crucial for maintaining accurate financial records. This practice allows you to quickly identify and resolve any issues that may arise.

4. Utilize payment integrations

Integrating your payment systems with your accounting software can significantly streamline your invoice payment processes. This integration enables automatic data synchronization, reducing manual data entry and minimizing the risk of errors.

The Best Solution for Paying Invoices from the US

When it comes to paying invoices from the US, using a dedicated bill pay service can greatly simplify the process and provide additional benefits. A reliable bill pay solution should offer features like Global Wires for international payments and USD ACH functionality for domestic transactions.

By using a comprehensive bill pay service, you can enjoy a centralized platform for managing all your invoice payments, regardless of the payment method or currency. This streamlined approach saves you time, reduces the risk of errors, and provides greater visibility into your financial transactions.

If you’re looking for a comprehensive solution to streamline your invoice payment process, we invite you to explore Float’s Bill Pay service. With features like Global Wires and USD ACH functionality, our platform is designed to simplify the way you manage and pay your invoices from the US. Get started for free today and experience the benefits of a powerful, user-friendly bill pay solution that can help you save time, reduce errors, and maintain better control over your financial transactions.

Frequently Asked Questions

To pay an invoice, you’ll need the invoice number, amount due, due date, and payment instructions provided by the vendor.

Yes, many vendors accept credit card payments for invoices. However, be aware of potential fees associated with this payment method.

After making a payment, verify that the funds have been received by the vendor and record the transaction in your accounting system for accurate bookkeeping.

To efficiently track invoice payments, maintain detailed records of all transactions and relevant documentation. Utilize accounting software to manage invoices and monitor payments. Regularly review your records to ensure accuracy and compliance.

Float is Free to use on our Essentials plan, where you will be able to issue unlimited virtual CAD/USD cards, earn 4% interest on deposits, reimburse employees and pay vendor bills. If you need more sophisticated functionality, like over 20 physical cards, Netsuite integration, or an API solution, you will have to consider our paid Professional and Enterprise plans.

Float offers Charge Card and Prepaid funding models. You can apply (*Conditions apply. Book a demo to learn more) for unsecured, 30-day credit terms with high limits up to $1M, no credit checks and personal guarantees. Prepaid model offers 4% interest on all deposits with no cash lockups with account opening in < 24 hours.

Unlike traditional cards that get you to spend more, Float is the only corporate card in the world that helps businesses spend less. Through a combination of financial rewards like our 1% cashback, 4% interest on deposits, no FX fees with our USD cards and time savings of at least 8 hours per employee Float’s customers on average save 7% on their spend.
How to Find My Corporation or Business Incorporation Number?

Struggling to locate your business incorporation number? You’re not alone. Many entrepreneurs find themselves scratching their heads when it comes to this crucial piece of information. Let’s dive into what a business incorporation number is and how you can track it down.

What Is a Business Incorporation Number?

A business incorporation number, also known as a corporation number or CRA number, is a unique identifier assigned to your company when it’s officially registered. Think of it as your business’s ID card.

Why It Matters

  • Legal requirement for various business activities
  • Needed for tax purposes
  • Essential for opening business bank accounts
  • Required when applying for loans or grants

What Is the Difference Between a Corporation Number and Business Incorporation Number?

In Canada, a corporation number is a unique identifier assigned to a corporation when it is registered with the federal or provincial government. This number stays with the company throughout its existence. A business incorporation number, on the other hand, refers specifically to the number assigned when a business is incorporated under the federal or provincial laws. While both numbers are linked to legal registration, the business incorporation number specifically relates to the incorporation process, whereas the corporation number identifies the entity for tracking purposes in government systems.

How to Find Your Business Incorporation Number?

Your business number is assigned by the CRA shortly after incorporation. You can find your business number through a free Government of Canada search or by consulting Canada’s Business Registries.

Your corporation number is assigned by Corporations Canada or a Provincial Business Registry upon incorporation. You can find your corporation number through a free Government of Canada search or by consulting Canada’s Business Registries. This number may also be referred to as your Registry ID. If you have both a business number and a corporation number, please provide your corporation number.

Grow Your Business With Float

Canada’s only finance & corporate cards platform that helps businesses save 7% on their spend.
What Does Corporation Number Look Like?

A CRA program account number has three parts:

  1. the nine-digit BN to identify the business
  2. a two-letter program identifier code to identify the program account
  3. a four-digit reference number to identify an individual program account (since businesses can have more than one of the same kind)

Example

You start a sole proprietorship. You need a GST/HST program account if you need to charge GST/HST. If you have one or more employees, you will also need a payroll deductions program account.

Once registered, your business will receive a:

BN:

  • 123456789

GST/HST program account number:

  • 123456789 RT 0001

Payroll deductions program account number:

  • 123456789 RP 0001

If your business does not receive the information, you will need to check that the program accounts were registered properly. If your business needs to confirm their account number(s), you will need to contact the CRA.

Note
If the business later incorporates, you will need to register for a new BN. This will generate an RC program account for corporation income tax and you will need to add other CRA program accounts that you require (RP, RT). You will then close the sole proprietor BN accounts if you do not need them for any other businesses that you operate. For more information, go to Corporation income tax program account.

Things to Remember:

  • Don’t confuse it with your tax ID number (they’re different!)
  • Beware of scam websites claiming to provide this info for a fee
  • Double-check the number’s format – it varies by country

FAQ

Is my business incorporation number the same as my tax ID?

Not always. In some countries, they’re separate numbers. Best to confirm with your local tax authority.

How long does it take to get a business incorporation number?

It varies, but typically you’ll receive it within a few days to a few weeks after registering your business.

Can I change my business incorporation number?

Generally, no. This number stays with your business for its entire life.

What if I can’t find my business incorporation number anywhere?

Don’t panic! Contact your local business registry or corporate affairs office. They can help you retrieve it.

Remember, your business incorporation number is a key part of your company’s identity. Knowing where to find it and how to use it will make your business operations smoother. Keep it handy – you’ll need it more often than you might think!

Best Accounting Software for Canadian Businesses

Running a Canadian business? You need the right tools to stay sharp and in the know. Keeping tabs on your finances can be a real headache, especially if you’re a small business owner wearing all the hats. We’ve spent years putting accounting software through its paces, and we’re here to share the cream of the crop. We’ve ranked the best accounting apps for small businesses based on user-friendliness, features, and value for money.

Two standouts have earned our top spots:

  • QuickBooks Online shines for small to medium-sized operations.
  • FreshBooks is perfect for solo entrepreneurs and tiny teams.

Ready to find your perfect match? Let’s dive into the best accounting software for Canadian businesses, along with everything you need to know to make the right choice.

Top Picks for Canadian Small Businesses

Our Reviews of Each Solution

Quickbooks Online – website

QuickBooks Online has become a go-to accounting software for many Canadian businesses, and for good reason. This cloud-based solution offers a robust set of features tailored to meet the needs of small to medium-sized enterprises.

Key Features

  • Invoicing: Create professional invoices and easily track payments.
  • Expense Tracking: Capture receipts with your smartphone and categorize expenses automatically.
  • Bank Connections: Sync with your bank accounts for real-time financial updates.
  • Canadian Tax Support: Automatically calculate GST/HST and prepare returns.
  • Payroll Integration: Manage employees’ pay and taxes (additional fees may apply).
  • Reporting: Generate detailed financial reports to gauge your business health.
  • Multi-User Access: Collaborate with your team or accountant in real-time.
  • Mobile App: Manage your finances on-the-go with iOS and Android apps.

Who It’s Best For

QuickBooks Online is particularly well-suited for:

  • Small to medium-sized businesses
  • Service-based companies
  • Retailers with inventory needs
  • Businesses looking for scalable solutions

Its versatility and comprehensive feature set make it a solid choice for many Canadian businesses looking to streamline their accounting processes.

Xero – website

Xero is a powerful cloud accounting solution gaining traction among Canadian businesses. Known for its user-friendly interface and robust features, Xero offers a fresh alternative to traditional accounting software.

Key Features

  • Bank Reconciliation: Automatically import and categorize bank transactions.
  • Invoicing: Create and send professional invoices, with online payment options.
  • Expense Claims: Easily track and manage business expenses.
  • Inventory Management: Keep tabs on stock levels and costs.
  • Project Tracking: Monitor time and costs for client projects.
  • Payroll: Manage employee payments and taxes (through integration with Payroll.ca).
  • Multi-Currency: Handle transactions in over 160 currencies.
  • Financial Reporting: Generate customizable reports for better insights.
  • Mobile App: Access your accounts on-the-go with iOS and Android apps.

Who It’s Best For

Xero is particularly well-suited for:

  • Small to medium-sized businesses
  • Companies with inventory management needs
  • Businesses that work internationally
  • Teams that value collaboration and need multi-user access

Its clean interface and strong feature set make Xero an attractive option for businesses looking for a modern, scalable accounting solution.

Canadian-Specific Features

  • GST/HST tracking and reporting
  • Integration with Canadian banks
  • Compliance with Canadian accounting standards

While Xero is newer to the Canadian market compared to some competitors, it’s rapidly evolving to meet the specific needs of Canadian businesses. Its cloud-based nature means you’re always using the latest version, with updates and improvements rolling out regularly.

Freshbooks – website

FreshBooks is the only free accounting software that’s gained popularity among Canadian freelancers, small business owners, and service-based professionals. Known for its user-friendly interface and focus on simplicity, FreshBooks offers a refreshing approach to managing finances.

Key Features

  • Invoicing: Create professional, customizable invoices with automatic payment reminders.
  • Expense Tracking: Easily capture and categorize expenses, with receipt scanning via mobile app.
  • Time Tracking: Built-in timer for accurate billing of hourly work.
  • Project Management: Collaborate with team members and clients on projects.
  • Client Portal: Provide clients with a secure space to view and pay invoices.
  • Reporting: Generate insightful financial reports including profit & loss statements.
  • Double-Entry Accounting: Ensures accuracy and is suitable for accrual accounting.
  • Bank Reconciliation: Connect your bank accounts for automatic transaction imports.
  • Mobile App: Manage your business on-the-go with iOS and Android apps.

Who It’s Best For

FreshBooks is particularly well-suited for:

  • Freelancers and solopreneurs
  • Service-based small businesses
  • Agencies and consultancies
  • Businesses prioritizing ease of use over complex features

Its focus on simplicity and strong project management tools make FreshBooks a go-to choice for many service-based professionals.

Canadian-Specific Features

  • GST/HST tracking and reporting
  • Integration with Canadian payment gateways
  • Support for Canadian tax rates
  • Compatibility with Canadian banks for bank feeds

The software’s strength lies in its simplicity and focus on the needs of service-based businesses. While it may not offer the depth of features found in some other accounting solutions, its ease of use and time-saving capabilities make it a compelling choice for many Canadian entrepreneurs.

Wave – website

Wave is a cloud-based accounting solution that’s made waves in the Canadian market, particularly among small businesses, freelancers, and entrepreneurs. Its standout feature? It’s free for accounting, invoicing, and receipt scanning.

Key Features

  • Accounting: Double-entry bookkeeping system
  • Invoicing: Create and send professional invoices
  • Receipt Scanning: Capture and organize receipts via mobile app
  • Bank and Credit Card Connections
  • Financial Reporting
  • Multi-Currency Support
  • Customizable Sales Taxes
  • Collaborator Access: Add accountants or team members

Paid Add-ons:

  • Payments: Accept credit card and bank payments (pay-per-use)
  • Payroll: Full-service payroll for Canadian businesses (monthly fee)

Who It’s Best For

  • Freelancers and solo-preneurs
  • Small service-based businesses
  • Startups and new businesses on a tight budget
  • Businesses with simple accounting needs

Canadian-Specific Features

  • GST/HST tracking and reporting
  • Integration with Canadian banks
  • Support for multiple currencies, including CAD

Wave stands out in the Canadian market for its commitment to providing free, capable accounting software. It’s an excellent starting point for new businesses or those with straightforward financial needs. The software is continuously updated, ensuring users always have access to the latest features.

While it may lack some of the advanced features of paid software, Wave’s core functionality is robust enough for many small Canadian businesses. Its pay-per-use payment processing and affordable payroll services allow businesses to add features as they grow.

Sage 50 – website

Sage 50 (formerly known as Simply Accounting) is a comprehensive accounting solution tailored for small to medium-sized Canadian businesses. Known for its powerful features and deep functionality, Sage 50 is a go-to choice for businesses with complex accounting needs.

Key Features

  • General Ledger: Detailed tracking of all financial transactions.
  • Accounts Payable & Receivable: Manage bills and invoices efficiently.
  • Inventory Management: Track stock levels, costs, and sales.
  • Job Costing: Monitor expenses and profitability for specific projects.
  • Payroll: Built-in Canadian payroll system with tax calculations.
  • Multi-User Access: Collaborate with team members and accountants.
  • Bank Reconciliation: Easily match transactions with bank statements.
  • Fixed Asset Management: Track depreciation and asset values.
  • Business Intelligence: Generate in-depth financial reports and forecasts.
  • Customizable Dashboard: Get a quick overview of your financial status.

Who It’s Best For

Sage 50 is particularly well-suited for:

  • Established small to medium-sized businesses
  • Companies with complex inventory needs
  • Businesses requiring detailed job costing
  • Organizations needing strong audit trails
  • Those preferring a more traditional accounting software approach

Its powerful features make Sage 50 a solid choice for businesses that have outgrown simpler accounting solutions.

Canadian-Specific Features

  • Built-in Canadian payroll with up-to-date tax calculations
  • GST/HST tracking and reporting
  • Compliance with Canadian accounting standards
  • Canadian-specific financial statements and forms

As a long-standing player in the Canadian accounting software market, Sage 50 is deeply attuned to the needs of Canadian businesses. It offers a level of depth and customization that many growing businesses find essential.

While Sage 50 is primarily a desktop solution, it does offer cloud access through Sage 50cloud, allowing for some of the flexibility of cloud-based systems while maintaining the robust features of the desktop version.

Choosing the Right Software for Your Business

Consider these factors:

  • Your budget – pick the tool that you can afford first and foremost
  • Business size and growth plans – make sure to choose something that will scale with your business. Switching accounting systems after the fact can be very time consuming and costly
  • Needed features – research must-have features for your business needs (e.g., inventory, payroll).
  • Ease of use – find something that you will feel comfortable with yourself.
  • Give it a try – most of the tools offer free trials. Consider signing up on a trial and seeing if the software works for your needs.

Tips for Getting Started

If you still can’t decide on the right system, consider asking your bookkeeper for professional advice. Don’t have a bookkeeper? Consider our guide to learn how to find the best financial partner for your business.

If you don’t have anyone to ask for help, consider the following criteria:

  1. Take advantage of free trials
  2. Check for Canadian-specific features (like GST/HST tracking)
  3. Read user reviews from fellow Canadian business owners
  4. Ensure the software can grow with your business

Remember, the best accounting software for your Canadian business is the one you’ll actually use. Don’t get bogged down by fancy features you’ll never touch.

FAQ

Is there truly free accounting software for Canadian businesses?

Yes! Wave is a solid free option. Just be aware that some advanced features may come with a cost.

Do I need special accounting software if I’m a freelancer?

Not necessarily. Simple options like Wave or FreshBooks often suffice for freelancers and solo-preneurs.

Can I switch accounting software mid-year?

You can, but it’s best to do it at the start of a fiscal year to avoid complications.

How often should I update my books?

Aim for at least monthly updates, but weekly is even better for staying on top of your finances.

Finding the right accounting software can transform how you manage your Canadian business finances. Take the time to explore your options, and you’ll be on your way to smoother bookkeeping in no time.

Other Critical Accounting Tools – Spend Management Software

While accounting software forms the backbone of your financial management, there are other tools that can further streamline your business operations. One such crucial tool is spend management software.

Enter Float, a Canadian company offering innovative spend management solutions. Float’s platform is designed to work alongside your accounting software, providing real-time visibility and control over your business expenses.

Bill Pay and Reimbursements

Float is Canada’s only all-in-one corporate cards, reimbursements, and bill pay platform that helps customers:

  • Earn cashback on all categories and save on FX
  • Generate 4% interest on funds held with Float
  • Eliminate expense reports and receipt chasing
  • Close the books 5x faster at the month-end

Want to learn how companies like Clutch, Neo, Knix, and 1,000s of other Canadian businesses on average save 7% of their monthly spend with Float? Get started with Float today by clicking the button below!

Want to learn more before singing up? Book a demo today to learn more about the product from our team!