5 Best Bench Accounting Alternatives in 2026

Was your Canadian business impacted by the recent announcement from Bench Accounting about the service shutdown? While services have resumed following Bench’s acquisition, many finance leaders are still exploring alternative solutions due to the uncertainty—and hello, panic—that the initial announcement caused.

To help you make an informed decision about whether to stay parked with Bench or move on to greener platforms, we’ve compiled this guide to outline the details of Bench’s closure, the top alternative accounting software providers and how to migrate to a new solution. Make sure to check out our quick-view table below to compare key features, pricing and customer reviews.

Bench Accounting alternative bookkeeping solutions for Canadian SMBs

Whether you’re a startup, solopreneur, or established small business, there’s a Bench alternative out there for you. Let’s find the best fit for your business.

But first, some context.

Bench is shutting down. Or is it?

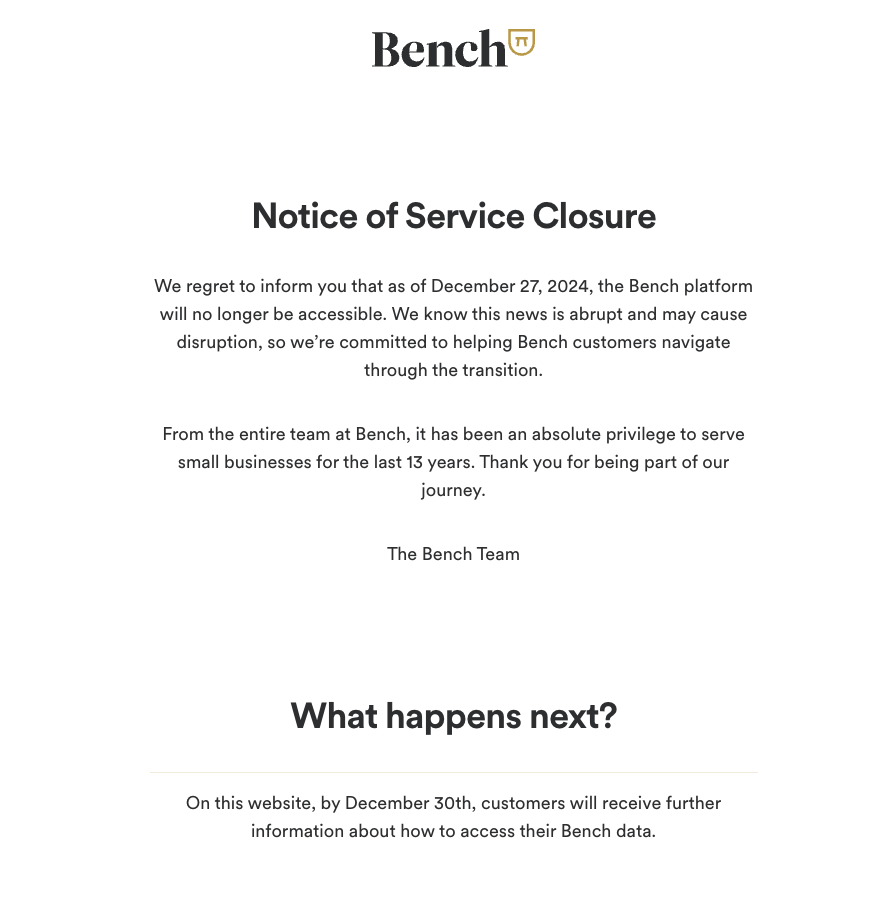
VC-backed bookkeeping platform Bench Accounting caused widespread panic among its customers after abruptly shutting down on Friday, December 27, 2024, locking thousands out of their accounts. The Vancouver-based start-up’s notice of closure left businesses that use its software scrambling for solutions, right as year-end and tax season loomed. But by the following Monday, payroll and onboarding tech company Employer.com announced its acquisition of Bench in a last-minute deal, and customer logins were restored.

But what about customer trust?

While plans are to revive Bench’s existing platform and allow customers to regain access to their data (with an option to either port their information or continue using the service as is), many challenges still remain. Chief among these is the impact of layoffs during the shutdown, which raises concerns about Bench’s service quality and platform reliability both during the transition and in the long term.

Bench’s former CEO and co-founder Ian Crosby released a statement on social media that further put into question the direction of the company over the past few years, following his abrupt dismissal.

Top Bench Accounting Alternatives
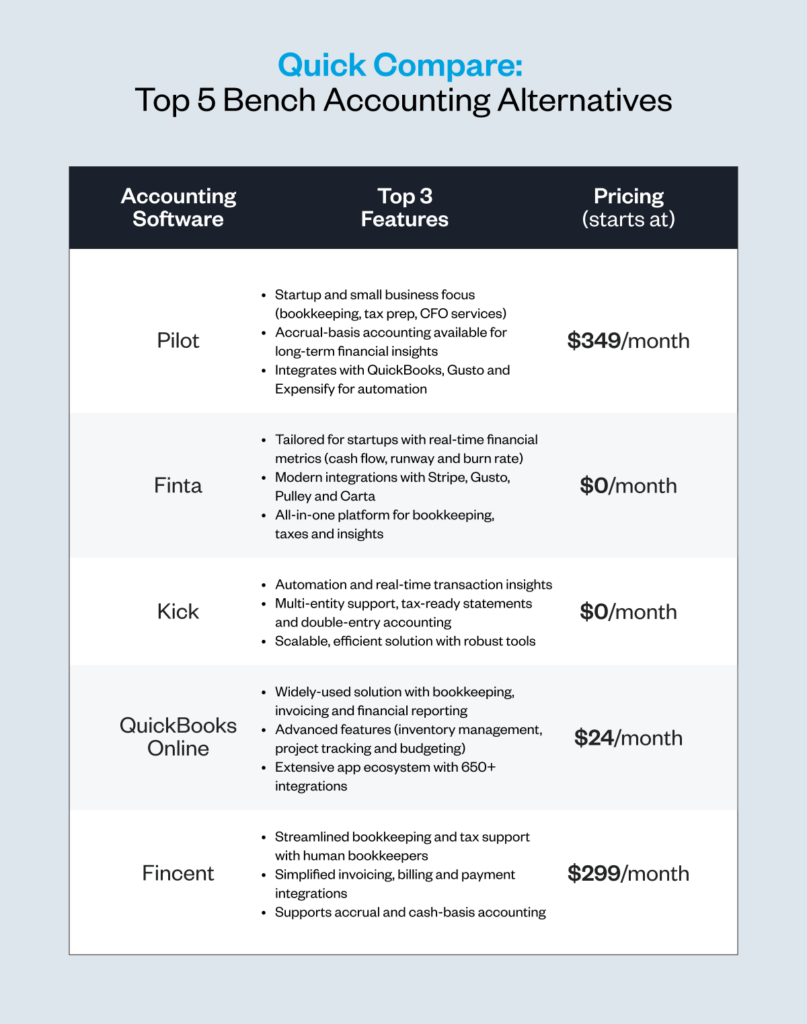
1. Pilot

Startup and small business focus: Pilot is an online bookkeeping and accounting service that caters to the needs of startups and small businesses. They offer bookkeeping, tax prep, and CFO services.

Accrual-basis accounting available: Unlike Bench, Pilot provides accrual-basis accounting in addition to cash-basis. This gives you a more accurate picture of your long-term financial health.

Integrates with top tools: Pilot connects with popular business tools like QuickBooks, Gusto, and Expensify to automatically import financial data. This saves time on manual data entry.

Pricing: Pilot offers three tiers, starting at $349 a month for Starter, $499 for Core and custom pricing for Plus.

Customer reviews:
“The consultative sales process made me confident in choosing Pilot for our accounting & tax needs, the onboarding process was smooth, and their online portal is eye pleasing, easy to use, and makes collaborating with our dedicated bookkeeper seamless.” Read more reviews from Capterra.

For a more detailed comparison of Pilot and Bench features, pricing, and reviews, check out this Pilot vs Bench comparison.

2. Finta

Built for startups: Finta offers a comprehensive, all-in-one accounting platform tailored specifically for startups, streamlining bookkeeping, taxes and financial insights within a single interface. This integration eliminates the need for multiple tools and services, providing real-time financial metrics such as cash flow, runway and burn rate, which are crucial for startup decision-making.

Ease of use for founders: Finta’s platform is designed to scale with startups, offering modern integrations with tools like Stripe, Gusto, Pulley and Carta, ensuring that as a startup’s financial management needs evolve, Finta can adapt accordingly.

Pricing: Finta offers three tiers, starting at $0 for Basic, $99 per month for Copilot and custom pricing for Assistant.Customer reviews: “Easy to use – Replaces spreadsheets and manual processes – More cost effective than competitor products – Unique approach to fundraising, making it easier to transfer funds from accredited investors.” Read more reviews from Capterra.

3. Kick

Automation and real-time insights: Kick automates bookkeeping tasks with real-time transaction categorization, personalized deduction management and customizable rules, providing immediate visibility into revenue and expenses.

Comprehensive financial tools: Offers features like multi-entity support at no additional cost, tax-ready financial statements and double-entry accounting for seamless collaboration with tax advisors or CPAs.

Scalable and efficient solution: Designed to save time and enhance accuracy, Kick outshines competitors like Bench by offering more robust tools such as real-time insights and automation, catering to modern business needs.

Pricing: Kick offers four tiers, starting with a free version, then moving to $35 per month for Basic, $125 per month for Plus and custom pricing for Enterprise.

Customer reviews: “I’ve had the chance to use Kick for a few months now, and as someone who does not like bookkeeping side of my business, I’m stoked there’s finally something user friendly and smart that I can use to automate my books. It’s literally built for businesses like mine, which are all online and have multiple streams of income.” Read more Product Hunt reviews.

Kick is the recommended solution by the Bench’s team and they offer a number of rewards for the customers who signup with them as part of the shutdown.

4. Quickbooks Online

Popular accounting software: QuickBooks Online is one of the most widely-used accounting solutions, with over 4.5 million subscribers worldwide. It offers a range of features for small businesses, including bookkeeping, invoicing, and financial reporting.

Advanced features available: While the basic QuickBooks plan includes essential bookkeeping tools, upgrading to a higher tier unlocks advanced features. These include inventory management, project profitability tracking, and budgeting.

Extensive app ecosystem: QuickBooks has its own app store with over 650 integrations for sales, marketing, operations, and more. There’s also a mobile app for accounting on the go.

Pricing: Quick Books offers four tiers, starting at $24, $54 for Essentials, $80 for Plus and $160 for Advanced. They also offer a free trial for 30 days and significant savings for the first six months.

Customer reviews: “I am enjoying using the online version and look forward to all the incentives for bringing and setting up clients, like revenue share and affiliate commissions. QB still remains the easiest and most valued bookkeeping software that I will recommend. There are video tutorials for literally everything.” Read more reviews from Capterra.

5. Fincent

Streamlined bookkeeping and tax support: Fincent combines intuitive software with human bookkeepers to deliver accurate, balanced books by the 15th of every month, alongside year-round support for business and personal tax filings.

Comprehensive financial tools: Features include simplified invoicing and billing, digital payment requests, and integration with payment methods like ACH, credit or debit cards, ensuring seamless financial operations.

Scalable and flexible solution: Offers support for both accrual and cash-basis accounting, integrates with tools like QuickBooks, and provides a modern, adaptable alternative to traditional services like Bench Accounting.

Pricing: Fincent offers three tiers, starting at $299 per month for Basic, $899 for Core and $1549 for Power.

Customer reviews: “Fincent takes care of everything related to accountancy and they did all the work I didn’t want to do. They just did it and made my life much easier. We are a graphic design studio and I was pretty new to accounting and bookkeeping. From the moment I started using Fincent, they took care of everything for me. They did the technical configuration, set up everything from scratch, and even set up everything for me to get my taxes done right.” Read more reviews from Capterra.

How to Choose the Right Bench Alternative

Finding the right replacement for Bench starts with understanding your business’s needs. Whether you prefer hands-on support or a DIY approach, here are the key factors to consider to make an informed choice.

Bookkeeping vs full-service accounting

Some Bench alternatives like Pilot and Finta offer bookkeeping and tax services, similar to Bench. Others like QuickBooks are DIY accounting software. Consider how much hands-on support you need.

Pricing model

Bench and the Bench alternatives listed above all charge flat monthly rates based on your monthly expenses, using various tiered subscription plans. In contrast, other bookkeeping services often charge hourly. Use your must-have features list (see tip in the migration guide below) to help you compare pricing models and find the best value for your business.

Automation features

Look for a Bench alternative that automates manual tasks like data entry, invoicing, and reporting. This will save you time and reduce errors.

Integration with existing tools

Choose an accounting solution that connects with the business tools you already use, such as your POS system, payment processor or payroll service. This will avoid duplicate data entry.

Reporting capabilities

Make sure your Bench alternative generates the financial reports you need for tax purposes and decision-making. These may include a profit and loss statement, balance sheet and cash flow statement.

Customer reviews

Read reviews from verified users on third-party sites like Capterra and G2 to see how each Bench alternative stacks up in terms of features, ease of use, customer service and value for money. Make sure to read both the pros and cons to get a realistic view of the software in regular use.

Step-by-step guide: How to migrate from Bench Accounting to a new provider

Follow these steps to ensure a seamless migration and set your business up for success with your new bookkeeping solution.

  1. Download your data

The first thing you should do is download all of your data from Bench. Login to the website (now restored) and follow the prompts to export your financial records. While there is no longer a deadline of Friday, March 7th at 5:00pm ET, it’s best to retain access to all your information as soon as possible.

  1. Schedule demos

Most accounting software and bookkeeping services offer free demos or trials. Take advantage of these to see the platform in action and ask questions.

  1. List your must-haves

Have a list of your must-have features and integrations ready before you go into these demos. This could include invoicing, payroll, or project tracking. Use this checklist to evaluate each alternative and ensure it meets your needs.

  1. Consider migration services

If you have historical financial data in Bench, look for an alternative that offers migration services to transition your records. Some may charge a fee for this.

  1. Allow a transition period

Give yourself time to get comfortable with your new bookkeeping solution. It may take a few months to fully transition from Bench.

  1. Notify stakeholders

If you switch from Bench to another bookkeeping service, notify any stakeholders who may be affected, such as investors, lenders or your accountant.

While it may take awhile to explore these Bench alternatives and find the solution that’s right for your business, this guide should give you a place to start the process. The key is to prioritize your business’s unique needs and take the transition one step at a time to ensure a smooth and effective switch.

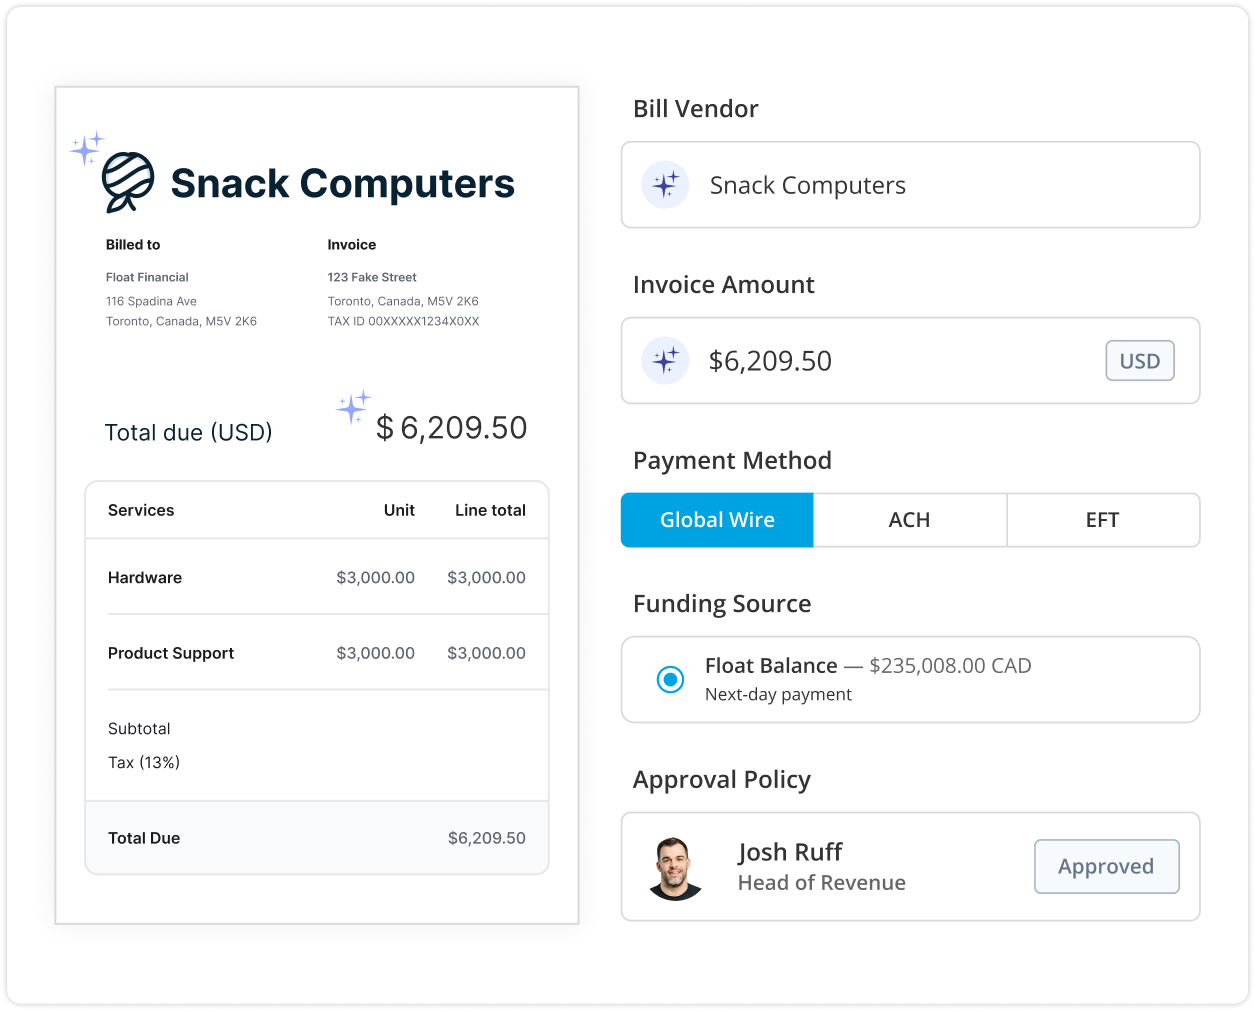
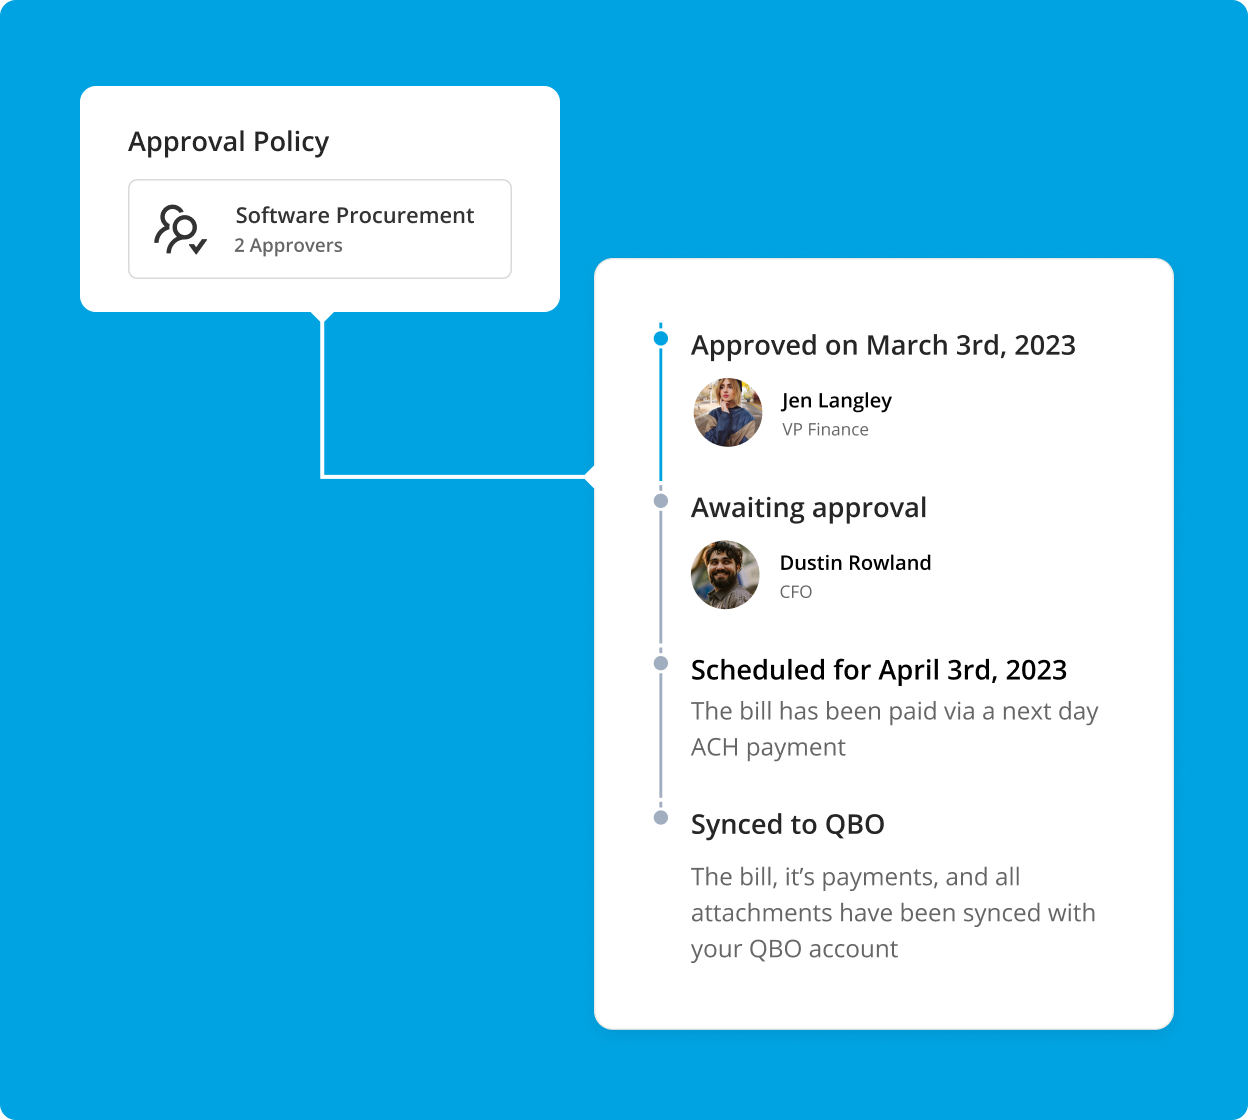
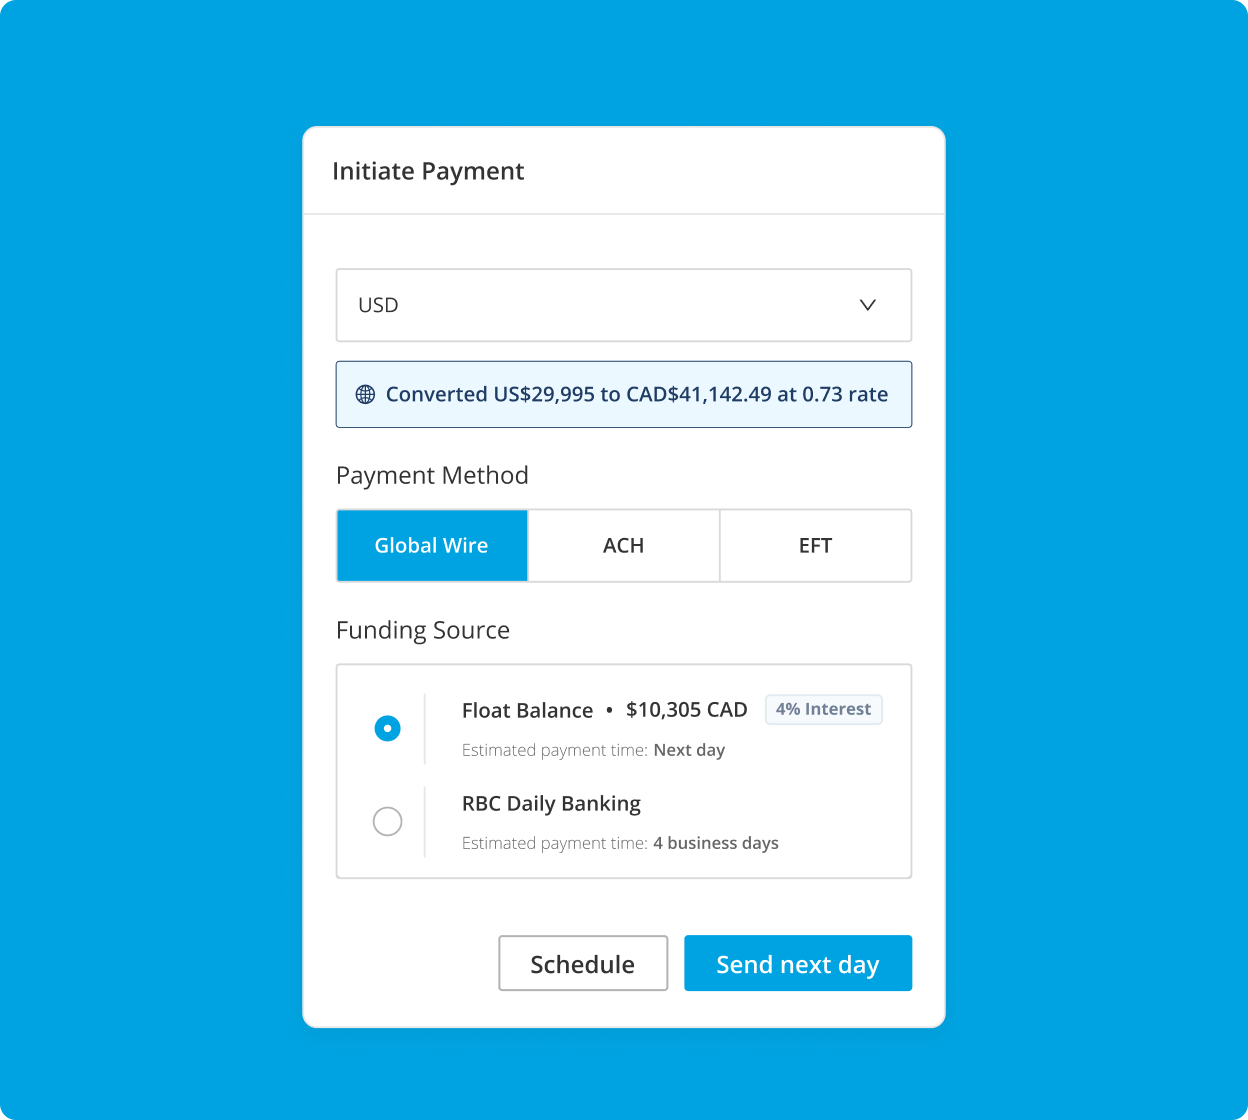
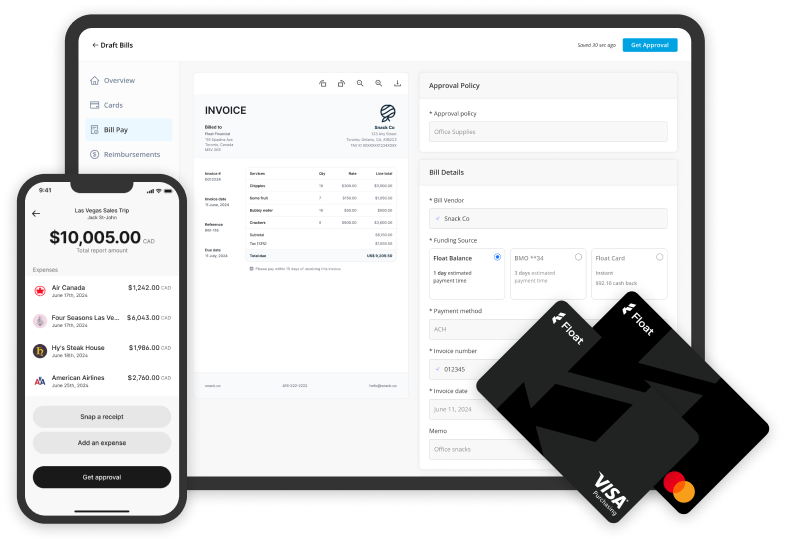
Also looking for a complete business finance solution designed for Canadian businesses? Explore Float!

Try Float for free

Business finance tools and software made

by Canadians, for Canadian Businesses.

Get started for free and see how we can help you streamline your bookkeeping, invoicing and expense management.

3 Effective Strategies to Speed Up Accounts Payable

As a finance professional, you understand the critical role that accounts payable plays in maintaining your company’s financial health and operational efficiency. However, managing accounts payable can be a complex and time-consuming process, often leading to delays, errors, and strained vendor relationships.

Fortunately, there are proven strategies you can implement to accelerate your accounts payable process, streamline operations, and enhance overall financial management. In this article, we’ll explore three effective ways to speed up your accounts payable cycle, leveraging automation, optimizing workflows, and transitioning to electronic payments.

By adopting these strategies, you can significantly reduce manual errors, accelerate processing times, and foster stronger relationships with your vendors, ultimately contributing to a more robust and efficient financial operation.

What is Accounts Payable?

Accounts payable refers to the money a business owes to its suppliers for goods or services purchased on credit. It is a critical component of a company’s financial operations and management, ensuring timely payments and maintaining strong vendor relationships. Efficient management of accounts payable can lead to improved cash flow and enhanced operational efficiency.

Accelerate Accounts Payable with Float

Automate bill intake, approvals, accounting sync, and pay anyone in the world with Float’s Bill Pay — plus unlock 7% savings on your spend.

Automate intake with Float’s AI powered OCR and inbox integrations

Streamline approvals with flexible workflows and policies

Pay via Global Wires, EFT, or ACH with Float’s next day payments

Strategy 1: Automate Invoice Processing

Implementing automation tools to handle invoice capture and data entry can significantly accelerate your accounts payable process. By leveraging accounts payable automation, you can reduce manual errors and accelerate processing times, ensuring invoices are processed accurately and efficiently.

Optical character recognition (OCR) technology can help digitize paper invoices, facilitating faster approvals and reduced processing time. This eliminates the need for manual data entry, minimizing the risk of errors and delays.

Strategy 2: Optimize Approval Workflows

Streamlining the approval process is crucial for accelerating your accounts payable cycle. By setting clear approval hierarchies and thresholds, you can ensure invoices are routed to the appropriate individuals for timely review and approval.

Utilizing digital platforms to route invoices electronically can significantly reduce bottlenecks and accelerate approvals. Implementing a flexible bill approval software like Float can help track and manage approvals efficiently, enhancing accounts payable efficiency and reducing delays.

Strategy 3: Transition to Electronic Payments

Moving from paper checks to electronic payment methods like ACH transfers and virtual cards can greatly speed up your accounts payable process. Electronic payments offer improved speed, reliability, and security compared to traditional paper checks. Learn more about the difference between ACH and EFT payments.

By using fast transfers, you can ensure payments are processed quickly and efficiently. Offering diverse, faster payment options to your vendors can enhance relationships and potentially lead to discounts and reduced processing costs.

Frequently Asked Questions

What are the most effective ways to accelerate accounts payable?

  • Automation: Automating invoice processing, streamlining approval workflows, and transitioning to electronic payments are highly effective strategies for accelerating accounts payable.

How can technology be leveraged to speed up the accounts payable process?

  • Leveraging tech: Technology can automate data entry, enhance approval workflows, and facilitate electronic payments, reducing manual errors and processing times.

What are common challenges in accounts payable and how can they be overcome?

  • Challenges and solutions: Common challenges include slow processing times and manual errors. These can be overcome by implementing automation and improving workflow efficiencies.

How does improving accounts payable impact overall business efficiency?

  • Business impact: Improving accounts payable leads to faster processing times, better cash flow management, and stronger vendor relationships, enhancing overall business efficiency.

Best Way to Accelerate Accounts Payable is with Float

By utilizing advanced automation tools and streamlined workflows, businesses can effectively manage their accounts payable processes, ensuring faster payments, reduced errors, and improved financial operations.

By implementing these strategies, you can significantly accelerate your accounts payable process, enhance financial operations, and foster stronger vendor relationships. We invite you to explore how our comprehensive automation solutions can help streamline your accounts payable workflow, reduce errors, and improve overall efficiency. Get started for free with us today and experience the benefits of a modern, optimized accounts payable process.

Accelerate Accounts Payable with Float

Automate bill intake, approvals, accounting sync, and pay anyone in the world with Float’s Bill Pay — plus unlock 7% savings on your spend.

Automate intake with Float’s AI powered OCR and inbox integrations

Streamline approvals with flexible workflows and policies

Pay via Global Wires, EFT, or ACH with Float’s next day payments

Bookkeeping Best Practices: How Often to Audit Your Books

As a business owner, you understand the importance of maintaining accurate financial records. Regular bookkeeping audits are essential for ensuring the integrity of your financial data and making informed business decisions. By establishing a consistent audit schedule and following best practices, you can stay on top of your finances and avoid potential pitfalls.

In this article, we’ll explore the concept of bookkeeping audit frequency and provide guidance on determining the right audit schedule for your business. We’ll also delve into the specific steps involved in conducting monthly reviews, quarterly audits, and annual comprehensive audits. By the end, you’ll have a clear understanding of how often you should audit your books and the benefits of doing so.

What is Bookkeeping Audit Frequency?

Bookkeeping audit frequency refers to the regular intervals at which a business reviews its financial records to ensure accuracy and compliance. This process is crucial for identifying discrepancies, maintaining financial health, and preparing for potential external audits or tax obligations.

How to Determine the Right Audit Schedule

Establishing a consistent audit schedule is vital for maintaining financial accuracy and compliance. Consider factors such as business size, transaction volume, and regulatory requirements when setting your audit frequency.

Use the bookkeepers guide to understand industry standards and best practices.

1. Monthly Bookkeeping Review

Conduct a monthly review to catch any irregularities early. This practice helps in understanding trends and making informed decisions.

A monthly review is also essential for verifying that all transactions are recorded accurately, aiding in fraud prevention.

2. Quarterly Financial Audits

Perform a more comprehensive audit quarterly to assess the overall financial health of your business.

Quarterly audits provide a more detailed analysis, allowing for adjustments in financial strategy and ensuring compliance with audit compliance guidelines.

3. Annual Comprehensive Audit

An annual audit involves a thorough review of all financial records and systems.

This audit is crucial for preparing financial statements, identifying long-term trends, and confirming compliance with all regulatory requirements.

Use resources like the float bookkeeper guide to streamline the audit process and ensure thoroughness.

Frequently Asked Questions

How often should you audit your books in a year?

Ideally, conduct monthly reviews, quarterly audits, and a comprehensive annual audit for optimal financial management.

What are the benefits of regular bookkeeping audits?

Regular audits help in early detection of discrepancies, informed decision-making, and preparation for tax obligations.

What steps are involved in conducting an internal audit?

Establish a schedule, gather necessary documents, review for accuracy, and rectify discrepancies.

How can auditing your books improve financial accuracy?

Auditing ensures that all transactions are recorded correctly, identifies errors, and enhances overall financial transparency.

Best way to audit your books is with Float

Using modern tools can significantly ease the auditing process. Automated platforms enable seamless tracking and analysis of financial data, ensuring compliance and accuracy. Explore solutions that offer real-time insights and streamline the entire bookkeeping audit process.

Streamline Compliance With Float

High limit corporate cards in both CAD and USD, perfectly paired with intelligent software that saves businesses 7% on their spend.

Sync all of transactions and receipts to your accounting system

Require employees to submit receipts and set GL codes per transaction

Maintain a centralized audit log of expenses, receipts, transactions, and expense approvals

Steps to Increase Your Business Credit Card Limit Effectively

As a business owner, you understand the importance of having the right financial tools at your disposal. Your business credit card or corporate credit card is one of those essential tools, providing you with the purchasing power and flexibility to manage expenses effectively. However, as your business grows and your spending needs evolve, you may find that your current credit limit no longer suffices.

Increasing your credit card limit can open up new opportunities for growth and streamline your cash flow management. But it’s crucial to approach this process strategically to ensure the best possible outcome for your business.

In this article, we’ll guide you through the steps to effectively increase your business credit card limit, from evaluating your financial health to making a formal request and following up with your card issuer.

How to Increase Your Business Credit Card Limit

Increasing your credit card limit can enhance your business’s purchasing power and cash flow management. It’s important to approach this strategically to avoid financial pitfalls.

Step 1: Evaluate Your Financial Health

Review your current financial statements, including cash flow and income statements. Ensure your business is in good standing with timely payments and low existing debt. This will help you present a strong case for a credit limit increase.

Step 2: Check Your Credit Score

A good business credit score is crucial for approval. Regularly monitor your credit to identify areas for improvement. Use resources like business credit card management tools to enhance your score.

Step 3: Prepare Necessary Documentation

Gather key financial documents such as tax returns and bank statements. Be ready to provide evidence of increased revenue or reduced expenses. This documentation will support your request for a higher limit.

Step 4: Contact Your Card Issuer

Reach out to your card issuer and inquire about their process for requesting a limit increase. Some issuers may allow you to increase credit limit online or by phone.

Step 5: Make a Formal Request

Submit a formal request for a credit limit increase, highlighting your business’s positive financial trajectory. Be clear about the reasons you need a higher limit, such as upcoming business investments or expansion plans.

Step 6: Follow Up

After submitting your request, follow up to check the status and provide any additional information if needed. Regular communication can demonstrate your seriousness and dedication to maintaining a good financial relationship.

Step 7: Explore Alternatives

If your request for a credit limit increase is denied, don’t be discouraged. There are alternative options available that may better suit your business needs.

Consider exploring other financial products, such as float charge card limits, which can offer more flexible spending limits tailored to your specific business requirements.

Best business credit cards

Compare top options, fees and benefits for

Canadian companies.

Tips on Managing Business Credit

1. Maintain a Low Credit Utilization Ratio

To maintain a healthy credit score, aim to use less than 30% of your available credit at any given time. This demonstrates responsible credit management and can positively impact your chances of securing a credit limit increase in the future.

2. Keep Financial Records Up-to-Date

Regularly update your financial records and monitor your expenses to stay on top of your credit situation. This will help you identify areas for improvement and make informed decisions when it comes to managing your business credit.

Frequently Asked Questions

What steps do I need to take to increase my business credit card limit?

To increase your business credit card limit, you should:

  • Evaluate your financial health: Review your financial statements and ensure your business is in good standing.
  • Check your credit scores: Monitor your credit scores and identify areas for improvement.
  • Gather necessary documentation: Prepare financial documents to support your request for a higher limit.
  • Contact your card issuer: Inquire about the process for requesting a limit increase.
  • Make a formal request: Submit a formal request, highlighting your business’s positive financial trajectory.
  • Follow up: Check the status of your request and provide additional information if needed.

What factors do credit card issuers consider when increasing a business credit card limit?

Credit card issuers typically consider several factors when evaluating a request for a business credit card limit increase, including:

  • Credit score: A good business credit score is crucial for approval.
  • Financial health: Issuers will review your financial statements to assess your business’s overall financial health.
  • Payment history: A history of timely payments and low existing debt can strengthen your case for a limit increase.
  • Business revenue: Evidence of increased revenue or reduced expenses can support your request for a higher limit.

How long does it take to get a credit limit increase on a business credit card?

The time it takes to get a credit limit increase on a business credit card can vary depending on the issuer and your specific situation. Typically, the process can take anywhere from a few days to a couple of weeks.

What are the benefits of having a higher business credit card limit?

Having a higher business credit card limit can offer several benefits, such as:

  • Increased purchasing power: A higher limit allows you to make larger purchases and investments for your business.
  • Better cash flow management: With more available credit, you can better manage your cash flow and cover expenses as needed.
  • Ability to finance larger business needs: A higher limit can help you finance larger business expenses, such as equipment purchases or expansion projects.

Get 10x Higher Limits with Float

By following these steps and tips, you can effectively increase your business credit card limit and unlock new opportunities for growth. At Float, we understand the unique financial needs of businesses like yours, and we’re here to help you navigate the complex world of business credit management.

Try Float for free

Business finance tools and software made

by Canadians, for Canadian Businesses.

Step-by-Step Guide to Registering for HST/GST in Canada

As a Canadian business owner, ensuring compliance with tax regulations is crucial for smooth operations and avoiding penalties. One key aspect of this is registering for the Harmonized Sales Tax (HST) or Goods and Services Tax (GST) with the Canada Revenue Agency (CRA).

Navigating the registration process can seem daunting, but with the right guidance, you can easily obtain your HST/GST number and start collecting and remitting these taxes. In this step-by-step guide, we’ll walk you through the process, from determining your eligibility to managing your account online.

By the end of this guide, you’ll have a clear understanding of how to register for an HST/GST number in Canada and be well-equipped to handle this important aspect of your business’s financial management.

What is HST/GST Registration?

HST/GST registration is the process by which Canadian businesses obtain the necessary accounts to collect and remit the Harmonized Sales Tax (HST) or Goods and Services Tax (GST). It is a legal requirement for most businesses that have taxable sales above the threshold set by the Canada Revenue Agency (CRA).

How to Register for an HST/GST Number in Canada

Understand the need for registration and its importance for your business operations.

Step 1: Determine Eligibility

  • Mandatory registration: Verify if your business meets the threshold for mandatory registration. Typically, businesses with taxable revenue over $30,000 in a calendar quarter must register.
  • Voluntary registration: Consider voluntary registration if your business is under the threshold but expects to exceed it soon. Not sure when is the right time to voluntarily register? Read our in-depth guide on When to Register for HST as a Small Business Owner in Canada?

Step 2: Gather Required Information

  • Business details: Prepare necessary documents such as your business name, physical address, and expected revenue.
  • Business activities: Collect details about your business activities, which will be needed for the registration process.

Step 3: Obtain a Business Number

  • Online registration: If you don’t already have a Business Number (BN), you can register for one online through the CRA’s Business Registration Online.
  • Importance of BN: This BN is essential for setting up your HST/GST account.

Step 4: Register for HST/GST

  • Online service: Use the CRA’s online service to register your HST/GST account once you have your BN.
  • Alternative methods: Alternatively, registration can be done via mail or telephone if preferred.

Step 5: Confirmation and Account Setup

  • Confirmation: After registration, you will receive a confirmation of your HST/GST number from the CRA.
  • Charging and collecting: Set up your business systems to begin charging and collecting GST/HST from customers.

Step 6: Manage Your Account Online

  • My Business Account: Register for My Business Account to manage your HST/GST accounts, file returns, and remit taxes.

Confident SMBs are 2x as likely to
expect >10% profit growth

See how they’re doing it.

Tips on Successful HST/GST Registration

1. Keep Accurate Records

Maintaining detailed and accurate records of all your sales transactions and the tax collected is crucial for ensuring compliance with CRA regulations. This practice will not only help you stay organized but also streamline the filing process when it comes time to submit your HST/GST returns.

By keeping meticulous records, you can easily track your taxable sales, input tax credits, and any adjustments that need to be made. This will save you time and effort in the long run, as well as reduce the risk of errors or discrepancies in your tax filings.

2. Use Online Tools

The CRA offers a range of online services and tools to help businesses efficiently manage their HST/GST obligations. By leveraging these resources, you can streamline your tax-related tasks and save valuable time that can be better spent on growing your business.

From registering for your HST/GST number to filing returns and making payments, the CRA’s online portal provides a convenient and secure way to handle your tax responsibilities. Take advantage of these tools to simplify your HST/GST management process.

Frequently Asked Questions

What documents are required for GST/HST registration?

When registering for a GST/HST number, you will need to provide essential documents and information about your business. This typically includes:

  • Business registration details: Your business name, physical address, and contact information.
  • Estimated revenue: An estimate of your expected taxable sales for the upcoming year.
  • Business activity descriptions: A brief overview of the goods or services your business provides.

Having these documents and information readily available will help expedite the registration process.

How long does it take to get a GST/HST number?

The time it takes to receive your GST/HST number can vary depending on the method of registration you choose. However, if you register online through the CRA’s portal, the process is typically completed within a few business days.

Once your registration is approved, you will receive a confirmation of your GST/HST number via email or mail. This number will be essential for charging and collecting the appropriate taxes on your sales.

Can I register for a GST/HST number online?

Yes, the CRA offers an online portal for businesses to register for their GST/HST number. The Business Registration Online (BRO) service allows you to apply for your business number and register for various CRA program accounts, including the GST/HST.

To use the BRO service, you will need to provide your Social Insurance Number (SIN) and some basic information about your business. The online registration process is straightforward and efficient, making it the preferred method for many business owners.

What are the benefits of registering for a GST/HST number?

Registering for a GST/HST number offers several key benefits for your business:

  • Input tax credits: As a registered business, you can claim input tax credits (ITCs) for the GST/HST paid on eligible purchases related to your business. This can help reduce your overall tax burden.
  • Compliance with Canadian tax laws: By registering and collecting GST/HST, you ensure that your business is compliant with Canadian tax regulations, avoiding potential penalties and legal issues.
  • Professionalism and credibility: Having a GST/HST number can enhance your business’s credibility and professionalism in the eyes of your customers and suppliers.

By following this step-by-step guide, you’ll be well on your way to successfully registering for an HST/GST number and ensuring compliance with Canadian tax regulations. To make managing your business expenses and HST/GST obligations even easier, consider using our all-in-one financial management platform. Get started for free today and let us help you streamline your business finances.

When to Register for HST as a Small Business Owner in Canada?

As a small business owner in Canada, navigating the complexities of HST registration can be daunting. However, understanding when and why to register for HST is crucial for your business’s financial well-being and growth. By familiarizing yourself with the criteria for mandatory registration and the benefits of voluntary registration, you can make informed decisions that positively impact your bottom line.

In this article, we’ll guide you through the essential aspects of HST registration, helping you determine whether registering is the right choice for your small business. We’ll explore the registration process, discuss the advantages of claiming input tax credits, and provide insights on how to streamline your financial management practices.

Automate Expense and HST/GST Tracking with Float

Canada’s only expense management and corporate cards platform that automates finance and helps businesses save 7%

What is HST Registration?

HST registration is the process by which Canadian businesses obtain a Harmonized Sales Tax (HST) number, enabling them to collect and remit HST on taxable sales. Registration is mandatory once a business exceeds the $30,000 revenue threshold in four consecutive quarters or a single quarter.

Why Consider HST Registration?

Registering for HST can be advantageous for small business owners in Canada by allowing them to claim input tax credits on business expenses and enhance their business credibility. Understanding the nuances of HST registration helps in making informed financial decisions.

How to Determine Mandatory Registration

  • Evaluate if your business meets the $30,000 threshold within a calendar quarter or four consecutive quarters.
  • Identify if your sales are taxable or exempt supplies.
  • If you exceed the threshold, registration is mandatory; otherwise, consider voluntary registration for benefits like input tax credits.

Steps to Register for HST

  • Begin the process through Business Registration Online provided by the Canada Revenue Agency.
  • Obtain a business number and GST/HST account number upon successful registration.
  • Ensure accurate documentation of all taxable sales and input tax credits for efficient HST filing.

Ready to register? Checkout our Step-by-Step Guide to Registering for HST/GST in Canada.

Benefits of Voluntary HST Registration

  • Gain access to input tax credits, reducing the cost of business expenses.
  • Enhance business credibility with a registered HST number.
  • Streamline financial management and prepare for future growth by anticipating and managing tax obligations early on.

Reasons to Register for HST

1. Financial Preparedness

Registering early helps manage cash flow through input tax credits, easing the financial burden on small businesses.

2. Enhanced Business Operations

With HST registration, businesses can better track expenses and revenues, contributing to more accurate financial reporting.

Frequently Asked Questions

What are the criteria for mandatory HST registration for small businesses in Canada?

A business must register for HST if it exceeds $30,000 in taxable sales within a single calendar quarter or over four consecutive quarters.

What are the benefits of voluntarily registering for HST as a small business?

Voluntary registration allows businesses to claim input tax credits on expenses, potentially lowering costs and increasing profitability.

How does the $30,000 threshold affect my decision to register for HST?

Exceeding the $30,000 threshold mandates HST registration, while staying below it allows for voluntary registration to claim tax credits.

What is the process for registering for an HST number in Canada?

Businesses can register online through the CRA’s Business Registration Online service to obtain a business number and HST account.

Best way to manage your business expenses

For efficient expense management and seamless HST tracking, leverage modern financial tools that offer real-time reporting and automated accounting features. Consider solutions that enhance your financial oversight and simplify tax management processes.

Automate Expense and HST/GST Tracking with Float

Canada’s only expense management and corporate cards platform that automates finance and helps businesses save 7%.

Automatically capture receipts via text, mobile app, or email after each purchase.

Let Float’s AI match receipts to transactions and capture taxes, tip, and GL codes.

Export each transaction right to your accounting platform to stay compliant.

By understanding the ins and outs of HST registration and implementing effective expense management strategies, you can set your small business up for long-term success. We’re here to support you on this journey with our innovative financial solutions designed specifically for Canadian businesses. Get started for free today and discover how we can help you streamline your finances and grow your business with confidence.

Review of Float’s Platform Demonstrates How Canadian Businesses Can Streamline Financial Operations

Toronto, Ontario, October 21, 2024 – Float is making waves in the expense management space. A recent review by CardRates.com showcases how we’re transforming finance for Canadian businesses, with the unique ability to pair corporate cards with accounting software. In their piece, “How a Money Services Business Pairs Finance and Software to Streamline Corporate Spend Management,” CardRates delved into Float’s innovative approach to simplify and optimize corporate spending. Businesses using Float gain better control, improved transparency, and seamless automation in their financial management workflows.

Grow Your Business With Float

Canada’s only finance & corporate cards platform that helps businesses save 7% on their spend.

Streamlining Corporate Spend with Smart Technology

CardRates.com highlights how Float’s platform simplifies expense management, empowering companies to gain real-time visibility and control over spending. Through a combination of smart corporate cards, automated expense tracking, and next-day bill payments, Float provides Canadian businesses with the tools they need to operate more efficiently. The platform’s automation features eliminate tedious manual processes, allowing finance teams to focus on higher-value tasks, like strategic planning and decision-making.

Float’s powerful integration capabilities with accounting platforms further ensure that all financial data remains organized and up-to-date. Businesses can automate receipt matching, expense categorization, and reporting, which improves accuracy and reduces the risk of errors.

Customized Solutions for Canadian Businesses

Designed specifically for Canadian businesses, Float offers more than just expense management. The platform delivers next-day bill payments, high-yield cash accounts, and customizable spend controls, allowing businesses to manage their finances with unprecedented flexibility. The review emphasizes Float’s commitment to serving the unique needs of Canadian companies, from small and medium-sized enterprises (SMEs) to fast-growing startups.

According to CardRates.com, users of Float’s platform see significant time savings, streamlined workflows, and better financial decision-making. The user-friendly interface, combined with advanced features, positions Float as a key player in the Canadian fintech space.

Float’s Innovative Approach to Financial Control

Float believes that modern businesses should have access to financial tools that not only simplify operations but also drive growth. By offering real-time reporting and spending analytics, Float gives companies the insights they need to make informed financial decisions. The platform’s commitment to empowering businesses through technology sets it apart from traditional financial institutions, which often lack the flexibility and innovation needed by fast-growing companies.

Float’s success, as noted in the CardRates.com review, is rooted in its ability to provide powerful financial solutions while maintaining a focus on ease of use and automation. This makes it an attractive choice for Canadian businesses looking to optimize their financial management processes.

Continuing Float’s Mission

We’re proud to be recognized by CardRates.com and continue our mission to bring modern financial solutions to Canadian companies, helping them grow faster and more efficiently. Check out the full article here.

Learn how Float can help your business streamline financial workflows

Float is Canada’s only all-in-one corporate cards, reimbursements, and bill pay platform that helps customers:

  • Earn cashback on all categories and save on FX
  • Generate 4% interest on funds held with Float
  • Eliminate expense reports and receipt chasing
  • Close the books 5x faster at the month-end

Want to learn how companies like Clutch, Neo, Knix, and 1,000s of other Canadian businesses on average save 7% of their monthly spend with Float? Get started with Float today by clicking the button below!

Want to learn more before singing up? Book a demo today to learn more about the product from our team!

Top Five Use Cases for Virtual Cards in Canadian Businesses

As a Canadian business owner, you’re always looking for ways to streamline operations, reduce costs, and improve security. Virtual cards can help you achieve all of those goals and more. In this article, we’ll explore the top 5 use cases for virtual cards in Canadian businesses and show you how they can benefit your company.

Virtual cards are a powerful tool that can transform the way you manage expenses, pay vendors, and control spending. By understanding the key use cases and benefits, you can make an informed decision about whether virtual cards are right for your business.

What are virtual cards?

Virtual cards are a type of digital corporate credit card numbers that provide an extra layer of security for online transactions. They function like regular credit cards but are not physical, plastic cards. Virtual cards can be instantly issued and come with enhanced controls like spend limits and expiration dates. Read more about the history of virtual cards in our deep dive — Discover: Virtual Credit Cards for Canadian Businesses

Instantly Issue Unlimited Virtual Cards with Float

Canada’s only modern USD and CAD Visa and Mastercard virtual cards solution for businesses — plus cashback and average savings of 7%.

virtual cards

Secure vendor payments

  • Protect your primary credit card: Virtual cards allow you to pay vendors without exposing your primary credit card number.
  • Prevent overcharging: You can set custom spend limits for each vendor to prevent overcharging.
  • Set expiration dates: Automatically set the virtual card to expire after a single use or on a specific date.
  • Earn rewards: Earn cash back rewards on vendor spend while maintaining tight control.

Simplify employee expenses

  • Provision virtual cards for specific purchases: Provision virtual cards to employees for specific purchases like travel, supplies or subscriptions.
  • Eliminate expense reports: Eliminate the need for employees to use personal cards and submit expense reports.
  • Set budgets and track spending: Set budgets for each virtual card and track spending in real-time.
  • Automate expense management: Automatically capture receipts and export expense data to your accounting system.

Manage subscriptions and recurring payments

  • Create virtual cards for each subscription: Create virtual cards for each subscription or recurring bill.
  • Prevent surprise increases: Set the exact amount to be charged each billing cycle to prevent surprise increases.
  • Schedule automatic cancellation: Schedule the virtual card to cancel on the subscription end date.
  • Easily update payment details: Easily update payment details if you change credit card providers.

Control online advertising spend

  • Manage ad spend by platform: Use virtual cards to manage spend on Google, Facebook, and other online ad platforms.
  • Set proactive spend limits: Proactively set daily, weekly or monthly spend limits to keep campaigns on budget.
  • Get real-time visibility: Get real-time visibility into ad spend by campaign, platform and region.
  • Maintain budget flexibility: Maintain flexibility to increase budgets for high-performing campaigns.

Streamline reconciliation and reporting

  • Automate transaction syncing: Virtual card transactions automatically sync to your accounting system.
  • Capture detailed transaction data: Capture detailed information like merchant name, amount and date for each transaction.
  • Assign GL codes for faster close: Assign GL codes to virtual cards for faster month-end close.
  • Generate spend reports: Generate spend reports by employee, department, vendor or expense category.

Instantly Issue Unlimited Virtual Cards with Float

Canada’s only modern USD and CAD Visa and Mastercard virtual cards solution for businesses — plus cashback and average savings of 7%.

virtual cards

Frequently Asked Questions

Float’s virtual cards are issued by Visa for CAD cards and Mastercard for USD spending. They offer direct 1% cashback on all categories after the first 25K of monthly spend. Float operates on a Charge Card or Prepaid funding model. Prepaid model offers 4% interest on all deposits with no cash lockups with account opening in < 24 hours.

Virtual cards are the same as a traditional physical card with the exception that the card number for these cards is presented digitally. You can create and cancel virtual cards for any purchase and set custom limits on a per-card level to avoid overcharges from the vendors. Float’s virtual cards are excellent for recurring subscription expenses, digital ads spend, and one-off small employee purchases as they can be added into Apple or Android Wallet and deleted once the purchase is complete. Float’s Essentials plan offers unlimited virtual cards and <10 minutes account application time.

Signing up for Float takes less than 10 minutes and can be done fully online. Float does not require any personal guarantees and does not perform credit checks to open your account. Ready to get started on our Free Essentials plan? Sing-up today.

Float is Free to use on our Essentials plan, where you will be able to issue unlimited virtual CAD/USD cards, earn 4% interest on deposits, reimburse employees and pay vendor bills. If you need more sophisticated functionality, like over 20 physical cards, Netsuite integration, or an API solution, you will have to consider our paid Professional and Enterprise plans.

Float offers Charge Card and Prepaid funding models. You can apply (*Conditions apply. Book a demo to learn more) for unsecured, 30-day credit terms with high limits up to $1M, no credit checks and personal guarantees. Prepaid model offers 4% interest on all deposits with no cash lockups with account opening in < 24 hours.

Unlike traditional cards that get you to spend more, Float is the only corporate card in the world that helps businesses spend less. Through a combination of financial rewards like our 1% cashback, 4% interest on deposits, no FX fees with our USD cards and time savings of at least 8 hours per employee Float’s customers on average save 7% on their spend.

Unlock the Power of Corporate Virtual Visa Cards with Float

Float’s Virtual Visa Cards provide Canadian businesses with a complete virtual card solution. With unlimited cards, 1% cash back on every purchase, and powerful spend management software, Float makes it easy to control expenses and streamline operations. Plus, you can instantly issue cards, set custom limits, and automate reconciliation – all from one intuitive platform.

Ready to take control of your business expenses with virtual cards? We’re here to help you every step of the way. Get started for free with Float today and discover how our powerful virtual card solution can transform your financial operations.

“Float’s virtual cards continue to give our team the flexibility and autonomy they need and deserve.”

Andy O’Reilly
Senior Manager of Finance & Technology

How to Pay Invoices from the Philippines: A Step-by-Step Guide

Paying invoices from the Philippines is a common task for many businesses and individuals. Whether you’re a freelancer working with clients in the Philippines or a company outsourcing services, it’s crucial to understand the various payment methods available and how to use them effectively.

In this comprehensive guide, we’ll walk you through the step-by-step process of paying invoices from the Philippines, ensuring that your transactions are secure, efficient, and hassle-free.

By the end of this article, you’ll have a clear understanding of the best practices for paying invoices from the Philippines, allowing you to maintain strong business relationships and avoid any payment-related issues.

Want to learn more about the accounts payable process more generally? Check out our AP Guide here.

Make Global Wire Payments with Float

Canada’s best-in-class EFT, ACH, and Global Wires payments platform — plus average savings of 7%.

What is an Invoice?

An invoice is a document issued by a seller to a buyer that itemizes and records a transaction. Invoices are essential for businesses to request payment for products or services provided.

Why is it Important to Pay Invoices Promptly?

Paying invoices promptly helps maintain good relationships with suppliers, ensuring they continue to provide you with the goods and services your business needs. It also ensures smooth operations and cash flow management, as late payments can disrupt your supply chain and hinder your ability to meet customer demands. Moreover, timely invoice payments help you avoid late fees and penalties, which can add up quickly and eat into your profits.

How to Pay Invoices from the Philippines

When paying invoices from the Philippines, you have several methods to choose from, including bank transfers, online payment platforms, and digital wallets. Each method has its own advantages and considerations, such as transaction fees and processing times.

It’s essential to select the right payment method based on the specific requirements of your transaction, such as the amount being paid, the urgency of the payment, and the recipient’s preferences.

Step 1: Choose the Right Payment Method

  • Bank transfers: This method involves transferring funds directly from your bank account to the recipient’s account. Bank transfers are secure and widely accepted but may have higher transaction fees and longer processing times compared to other methods.
  • Online payment platforms: Platforms like PayPal and Stripe allow you to send payments electronically, often with lower fees and faster processing times than bank transfers. However, not all recipients may have accounts with these platforms.
  • Digital wallets: Mobile payment apps like GCash and PayMaya offer a convenient way to send money using your smartphone. These methods are fast and often have lower fees, but both parties need to have an account with the same provider.

Step 2: Gather Necessary Information

Before initiating a payment, ensure that you have all the necessary information, including:

  • Invoice number: This unique identifier helps track the payment and ensures it is applied to the correct invoice.
  • Payment amount: Double-check the amount due on the invoice to avoid overpayment or underpayment.
  • Recipient’s bank details: For bank transfers, you’ll need the recipient’s bank name, account number, and other relevant information, such as the SWIFT code for international transfers.

Providing accurate information is crucial to avoid payment delays or failed transactions.

Step 3: Initiating a Bank Transfer

To initiate a bank transfer for paying an invoice:

  1. Log in to your online banking account or visit your bank branch.
  2. Select the option to transfer funds and choose the account from which you want to send the money.
  3. Enter the recipient’s bank details, including their account number and SWIFT code (for international transfers).
  4. Input the payment amount and include the invoice number as a reference.
  5. Review the details and confirm the transaction.

Ensure that you have entered the correct bank details and reference numbers to avoid payment delays or failed transactions.

Step 4: Confirming the Payment

After completing the payment:

  1. Verify that the transaction has been successfully processed by checking your account statement or transaction history.
  2. Inform the recipient that you have made the payment, providing them with the transaction details, such as the amount paid, the invoice number, and the date of payment.
  3. Update your records to reflect the payment and keep a copy of the confirmation for future reference.

Confirming the payment with the recipient and updating your records helps maintain accurate financial records and prevents any misunderstandings.

Tips on Securing Your Payments

1. Double-check all details before confirming payment.

Before finalizing any payment, take a moment to review all the details, including the recipient’s information, payment amount, and invoice number. This simple step can help prevent costly errors and ensure that your payment reaches the intended recipient.

2. Use secure payment methods.

When paying invoices from the Philippines, opt for secure payment methods that offer encryption and protection against fraud. Trusted online payment platforms and digital wallets often provide additional security features, such as two-factor authentication and secure socket layer (SSL) encryption.

3. Global Wires in USD is the safest option

For large transactions or high-value invoices, consider using global SWIFT wires in USD. This method offers several advantages over other payment options:

  • Enhanced security: SWIFT wires are processed through a secure global network of banks, reducing the risk of fraud or unauthorized transactions.
  • Widespread acceptance: Most banks worldwide accept SWIFT wires, making it a reliable option for international payments.
  • Traceable transactions: SWIFT wires provide a clear audit trail, allowing you to track the status of your payment and confirm receipt by the intended recipient.

Make Global Wire Payments with Float

Canada’s best-in-class EFT, ACH, and Global Wires payments platform — plus average savings of 7%.

Streamline Your Global Wire Payments with Float

To simplify and optimize your invoice payment process, consider adopting a comprehensive payment solution that offers features tailored to your business needs. Look for a platform that provides:

  • Global wire transfers in USD: Securely send international payments using the SWIFT network, ensuring fast and reliable transactions.
  • AI-powered bill processing: Automate invoice data extraction and validation, reducing manual effort and minimizing errors.
  • Integrated accounting workflows: Seamlessly sync your invoice payments with your accounting software, streamlining your financial management processes.

By leveraging a powerful payment solution, you can save time, reduce costs, and improve the overall efficiency of your invoice payment process, allowing you to focus on growing your business. Get started for free today and experience the benefits of seamless global payments, AI-powered bill processing, and integrated accounting workflows.

Frequently Asked Questions

The most common payment methods for invoices in the Philippines include bank transfers like Global Wires, online payment platforms like PayPal, and digital wallets such as GCash. Choose the method that best suits your needs.

Processing times vary depending on the payment method used. Bank transfers may take 1-3 business days, while online payment platforms and digital wallets often offer instant or same-day processing.

Yes, most payment methods involve fees, such as transaction fees or currency conversion charges. Compare the fees associated with each method to find the most cost-effective option for your business.

If you experience issues with your invoice payment, first contact the recipient to confirm they have not received the funds. Then, reach out to your payment provider’s customer support for assistance in resolving the issue.

Float is Free to use on our Essentials plan, where you will be able to issue unlimited virtual CAD/USD cards, earn 4% interest on deposits, reimburse employees and pay vendor bills. If you need more sophisticated functionality, like over 20 physical cards, Netsuite integration, or an API solution, you will have to consider our paid Professional and Enterprise plans.

Unlike traditional cards that get you to spend more, Float is the only corporate card in the world that helps businesses spend less. Through a combination of financial rewards like our 1% cashback, 4% interest on deposits, no FX fees with our USD cards and time savings of at least 8 hours per employee Float’s customers on average save 7% on their spend.